

Regulations like the GDPR and CCPA impose strict penalties on businesses that fail to compliantly manage user consent. Organisations must have solid procedures to correctly gather and manage users’ preferences. This article will explore how to handle consent management in SGTM. Let’s dive right in!
How consent works in Server-side GTM
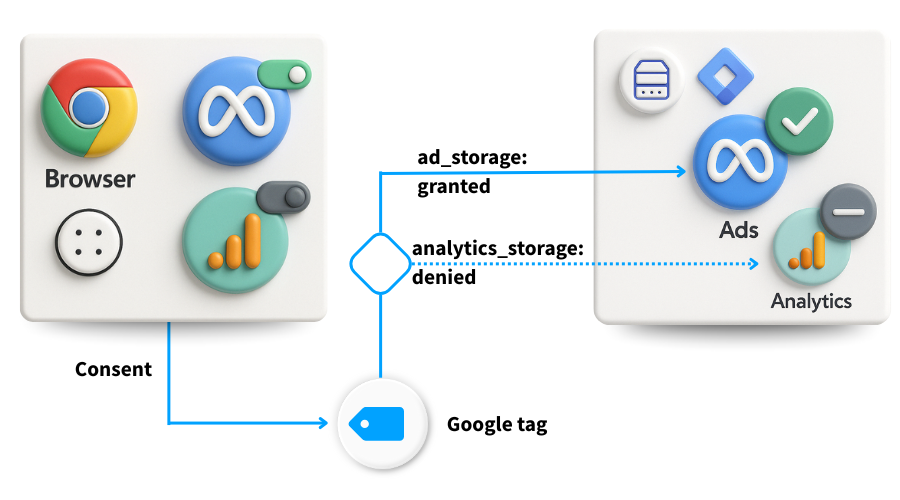
On your website, the consent banner collects each user’s consent choices and forwards them to a tag, like Google Tag, that conveys the consent status from the web environment to Server-side GTM (sGTM). On the server, tag behaviour is determined by the parameter value that carries the user’s consent status.
To implement consent management in Server-side GTM, you will need the following:
- A consent management platform such as Cookiebot CMP
- Both web and Server-side Google Tag Manager containers.
Prerequisite: configuring consent mode in GTM web container
Unlike standard web GTM, Server-side GTM does not yet have a built-in Consent Mode. You’ll need to set up Google or Microsoft Consent Mode within GTM before you can handle consent using Server-side. Let’s explore how you can do so.
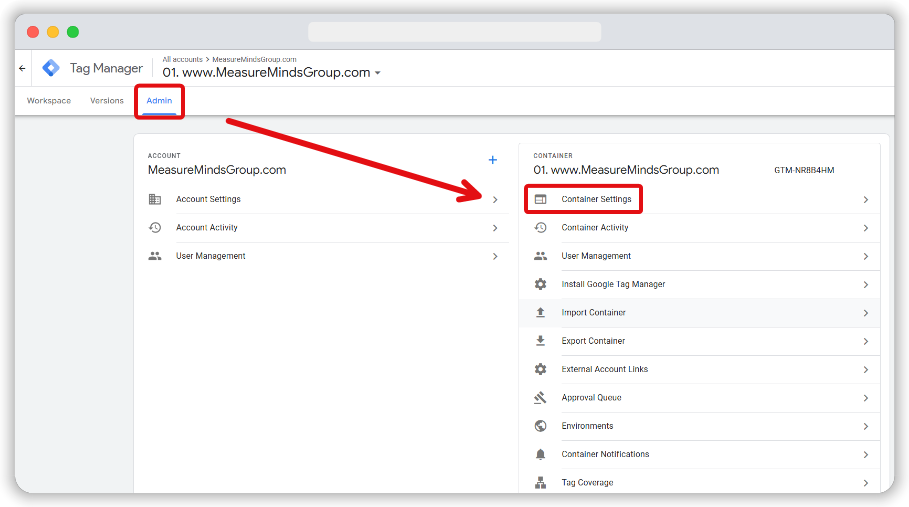
To begin, go to the container settings of your web GTM container by choosing Admin > Container Settings.
Now, make sure that Enable consent overview is ticked in the ‘Additional Settings’ section.

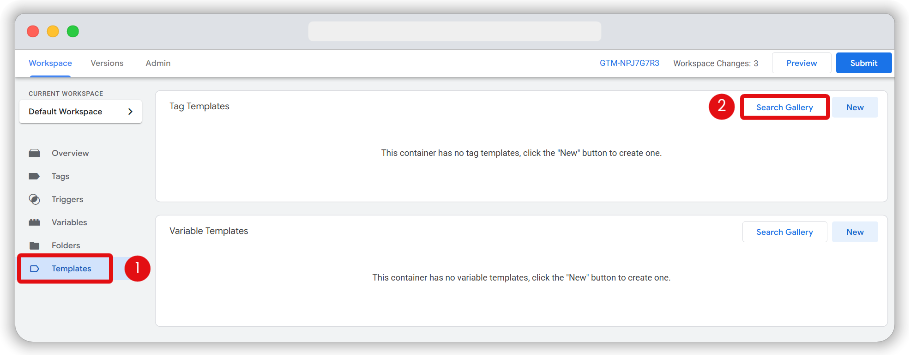
Next, add your Consent Management Platform tag to your web container. Let’s begin by adding the Cookiebot CMP template to your web GTM container. Go to Templates and select Search gallery in the tag templates section.
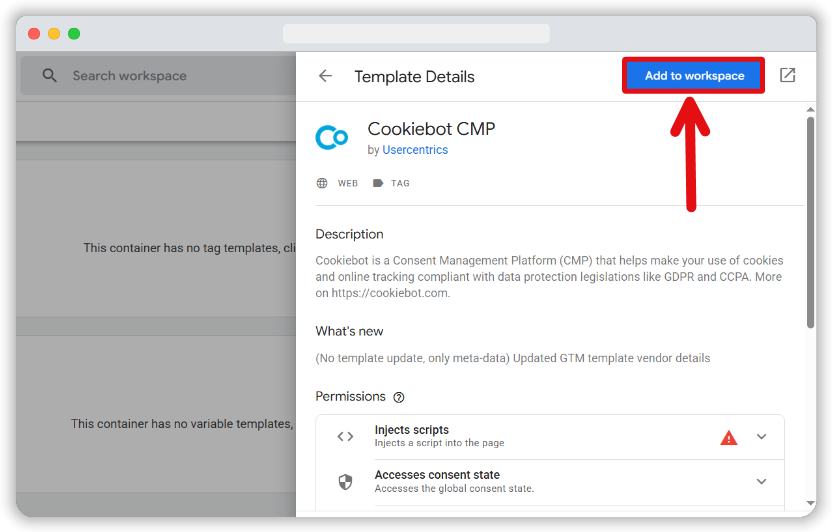
Now search for Cookiebot using the search bar. Cookebot CMP should be the first option to appear on the list. Select it and then click Add to workspace.
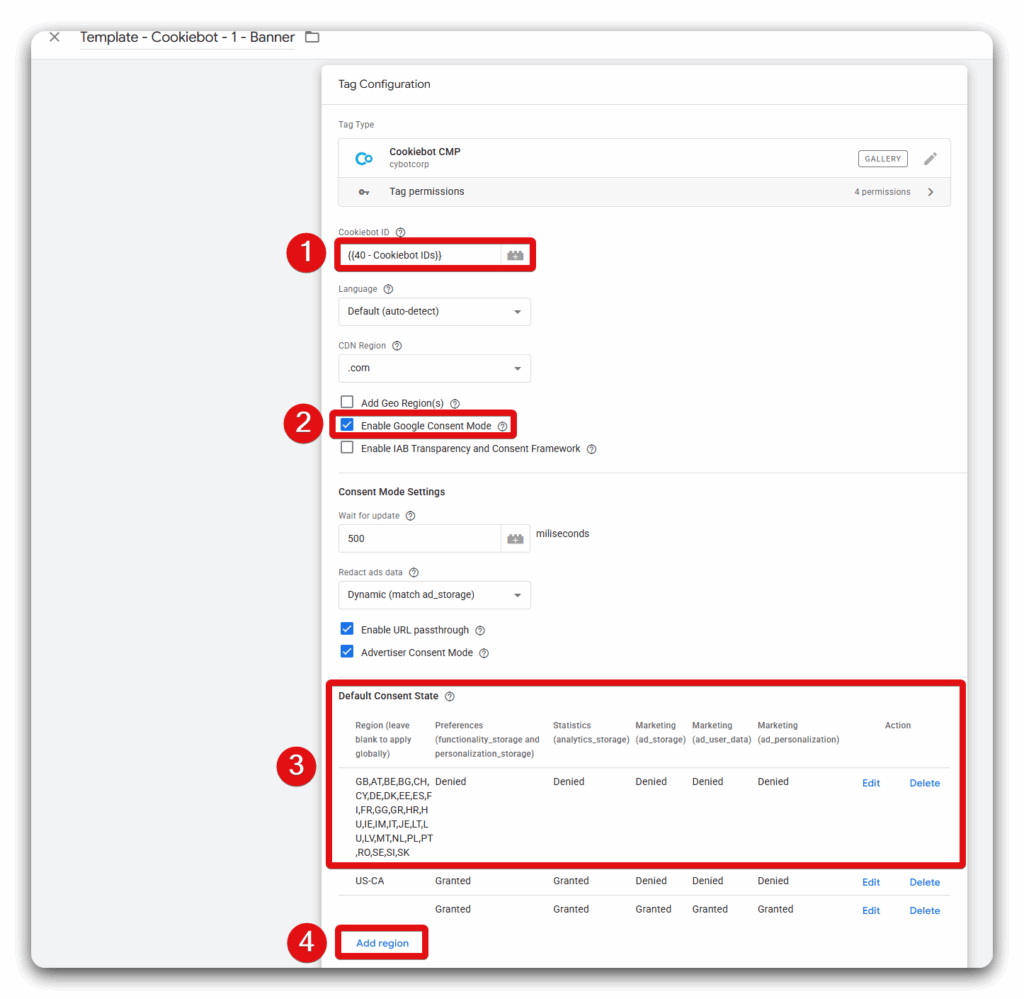
Open your Cookiebot account in a separate tab and copy your Cookiebot ID. Then, create a new tag using the Cookiebot template and paste your Cookiebot ID. Then, ensure that the Enable Google Consent Mode box is checked.
Choose a default consent state from the list. This will inform how tags behave before a user selects a consent preference. By default, Cookiebot sets consent to denied.
You can set regional settings for users who are not covered by regulations like the GDPR.
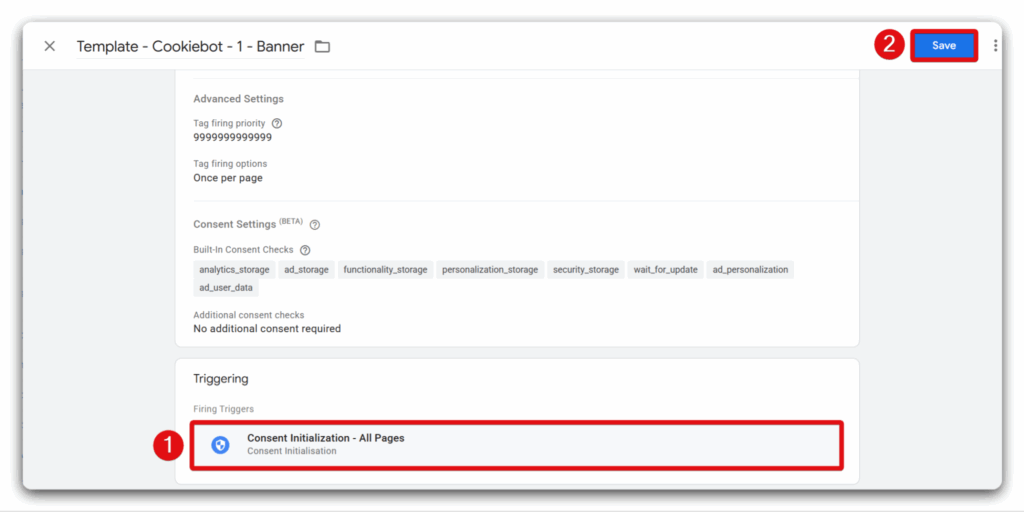
Lastly, use Consent initialization as the trigger for this tag to fire on.
In most scenarios, you don’t need to do anything for tags like Google Ads, Google Analytics, Floodlight, or the Conversion Linker, as they often include built-in consent checks. That said, it’s still best to review your consent management platform’s documentation, as setup details can differ among various Google products.
To stay privacy-compliant, you’ll need to do extra work for tags that don’t have a built-in consent mechanism. Let’s take Facebook Pixel as an example. It doesn’t automatically honour user consent, so you must choose when it fires based on each visitor’s preferences.
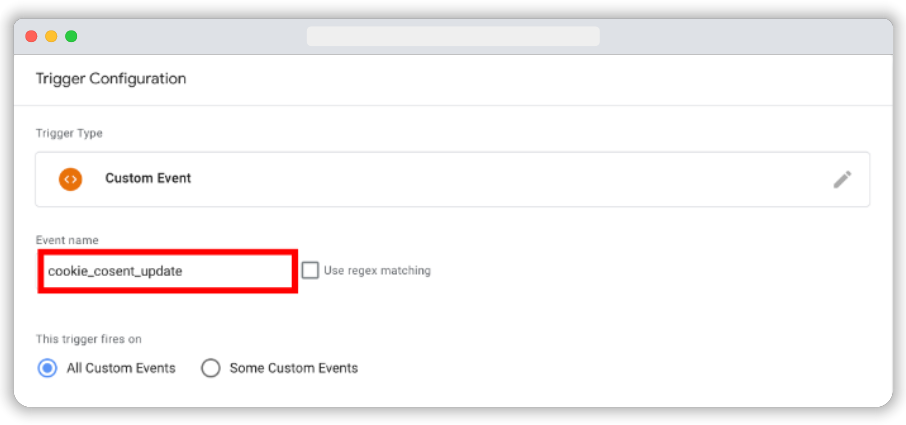
When a user allows cookie use, the Cookiebot CMP sends a custom cookie_consent_update event. We’ll add this as a custom event trigger on the Facebook Pixel tag.
Note: This custom event is only valid for Cookiebot CMP. If you’re using another CMP, then you need to adjust the custom event accordingly..
For trigger type, select Custom event. Now, enter cookie_consent_update into the event name section. Make sure that this tag is set to fire on All custom events.
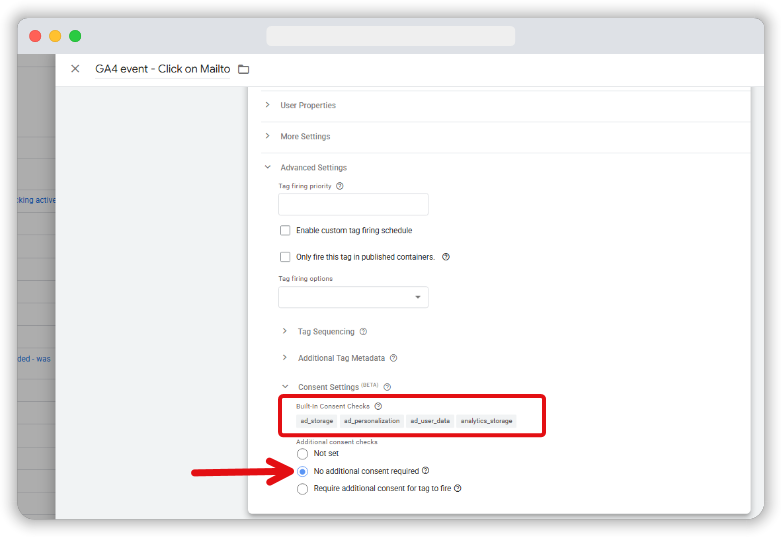
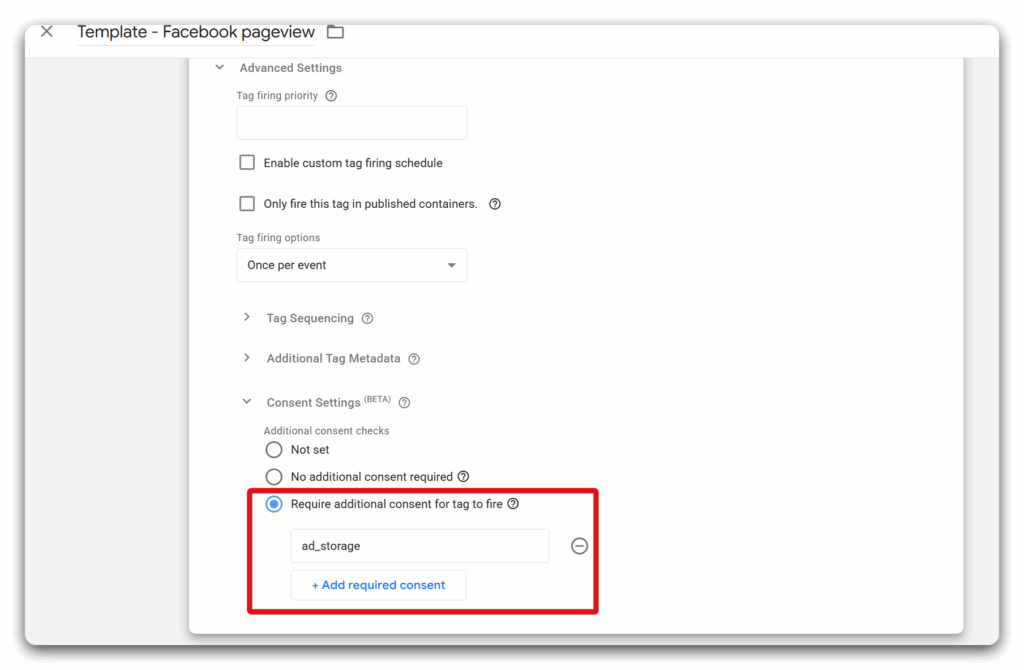
Now, choose Consent Settings and choose Require additional consent for the tag to fire. Add all the necessary consent categories that a user might give (e.g. ad_storage, analytics_storage, etc).
Make sure you apply these settings to all your Facebook tags. You can open Consent Overview from your web GTM container to see consent settings for all your tags.
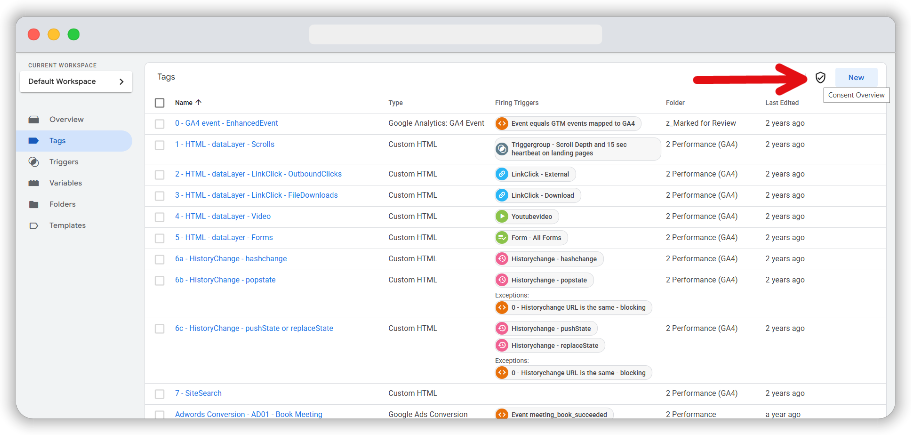
You can see both the tags for which consent has been set and those for which it has not.

Additional reading: Here’s how to achieve GDPR compliance for Facebook marketing.
Ways to manage consent in Server-side Google Tag Manager
After you set up consent mode for both GA4 and Facebook tags in your web GTM, it’s essential to ensure that server-side tags only run when the user has granted permission. In sGTM, you can tackle this in two primary ways:
- Use sGTM tags that include built-in consent checks like the Stape Facebook tag.
- Use gcs parameters to either block or trigger tags based on a user’s consent status.
Use sGTM tag templates that include built-in consent checks
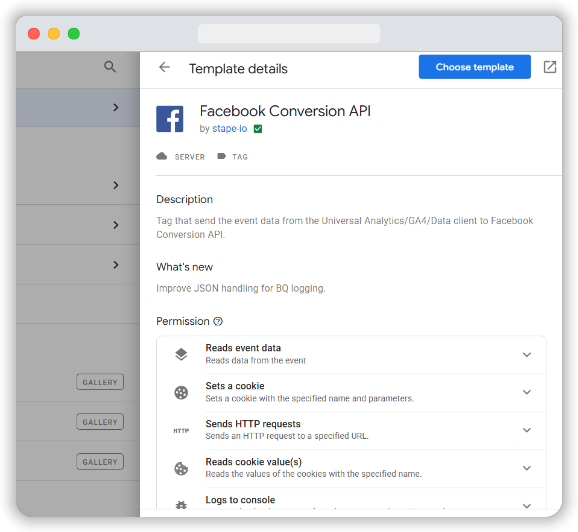
One straightforward approach to managing user permissions in your server-side container is to rely on a tag template with built-in consent features. One such example is Stape’s Facebook Conversion API tag template.
Its Consent Settings section offers a simple radio button called Send data in case marketing consent given.
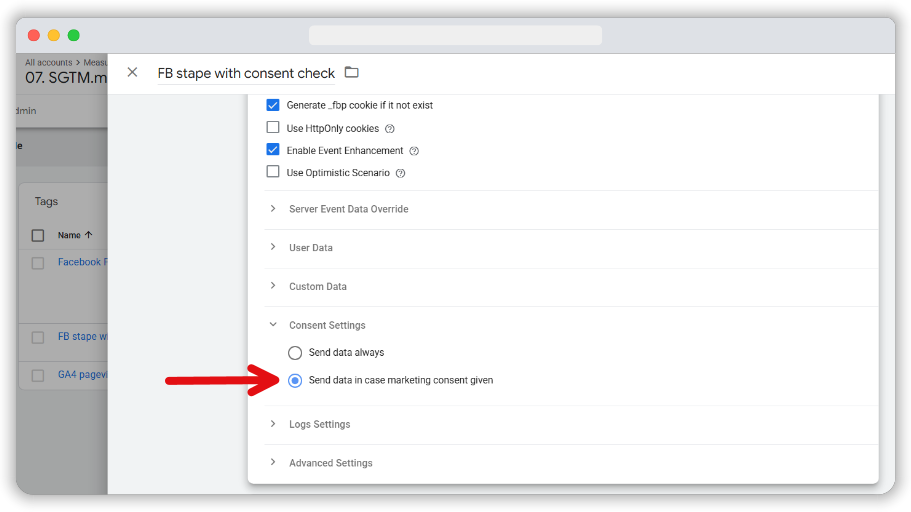
Enabling this option ensures that data is only transferred when a user explicitly grants marketing-related consent and helps maintain compliance with data privacy regulations.
Choosing a template that already handles consent requirements gives you greater control over when and how your server container processes and transmits data.
Use gcs parameter to allow or block tags
gcs, also known as Google Consent Signals, is another way to manage your server-side container. When Google Consent Mode has been set up correctly, network requests include the gcs parameter, shown as G1xy:
- The letter x stands for consent to Ads cookies
- The letter y stands for consent to Analytics cookies
A value of 1 indicates consent granted, while 0 means consent denied. Here’s a quick reference:
| gcs | Targeting cookies (ad_storage) | Analytics cookies (analytics_storage) |
| G100 | deny | deny |
| G101 | deny | granted |
| G110 | granted | deny |
| G111 | granted | granted |
By checking these parameters, you can choose whether to allow or prevent tags from firing in your server-side container.
Setting up a variable and trigger
Open your sGTM workspace and go to the Variables section. From the User-Defined Variables section, create a new variable.
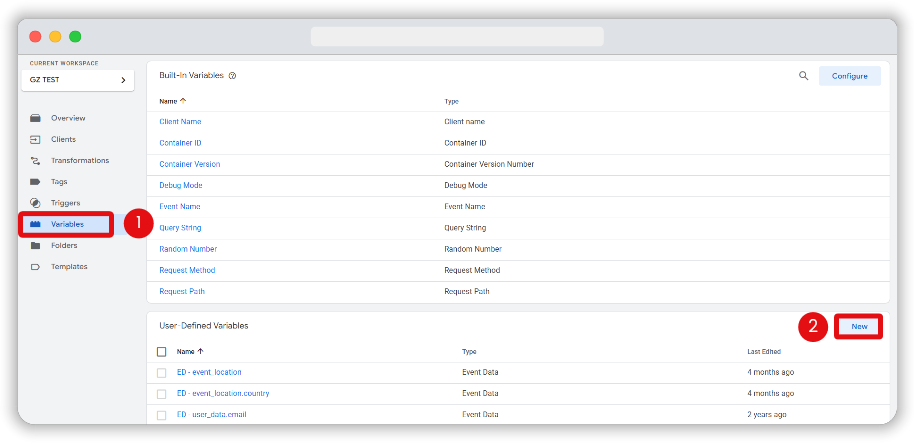
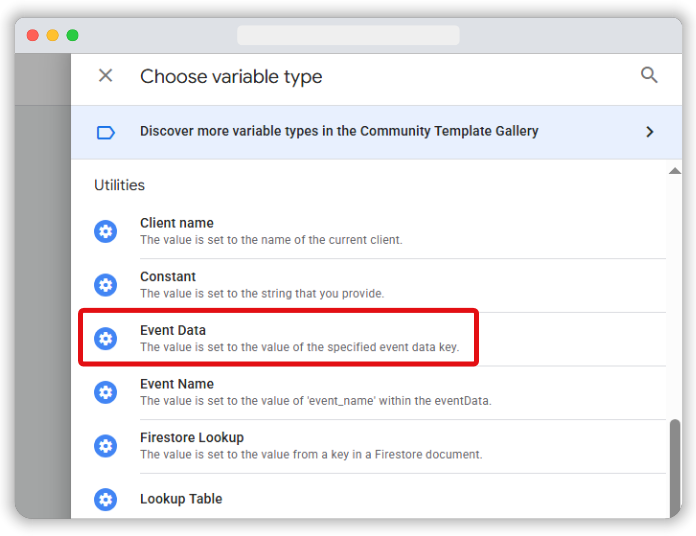
From the Utilities section of the variable type list, select Event Data.
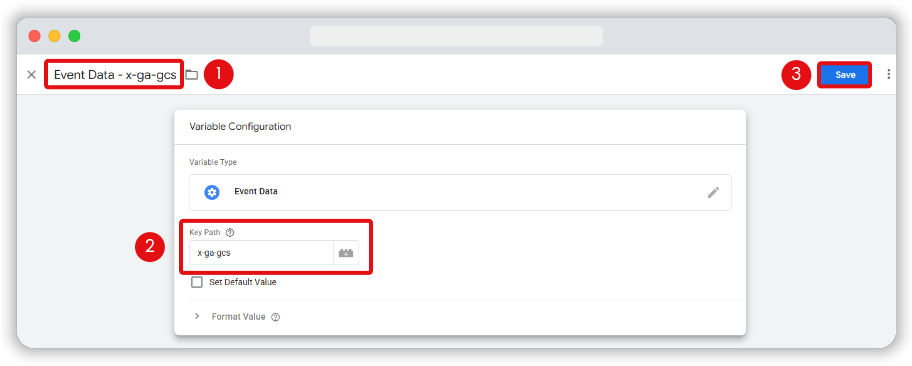
In the Key Path field, enter x-ga-gcs. Give it a clear label, such as Event Data – x-ga-gcs, and then click Save.
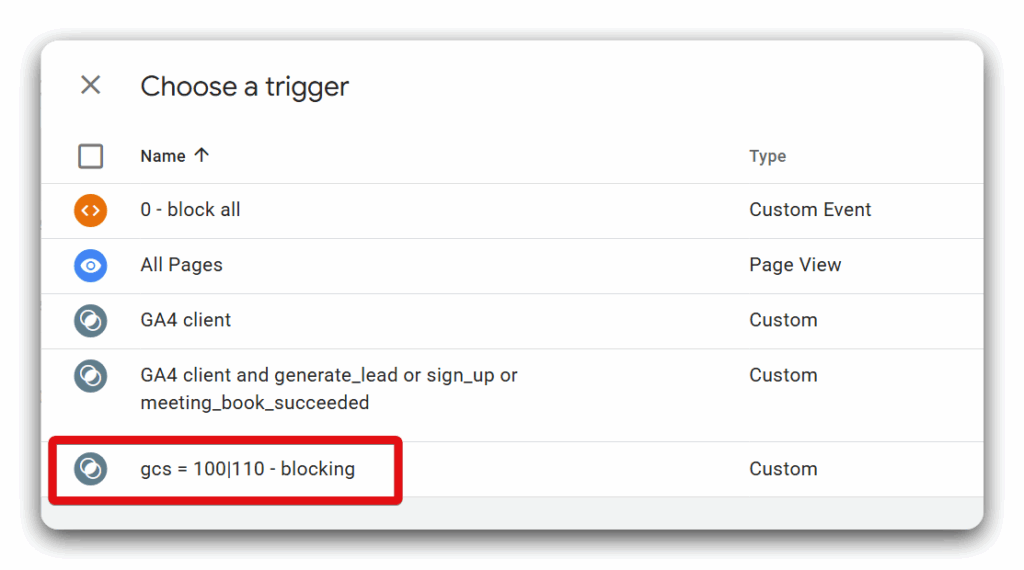
Next, we need to create a trigger that will block the tag from firing on the GA4 event you are using to trigger your sGTM tags.
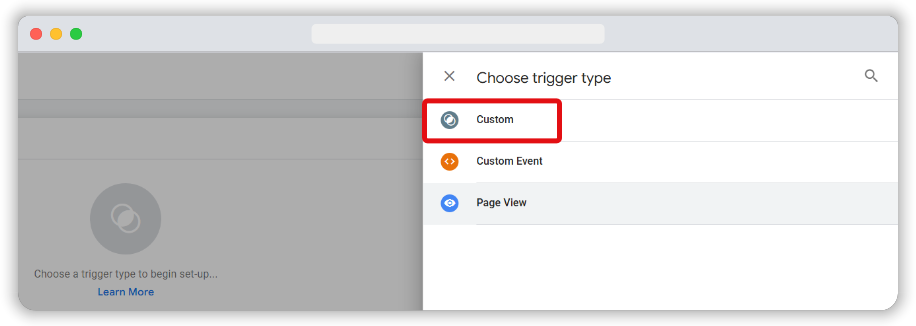
Open the Triggers area in your sGTM account and click New.
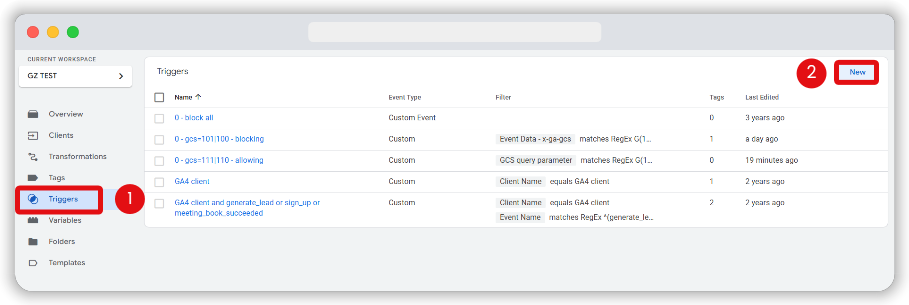
Select Custom as the trigger type.
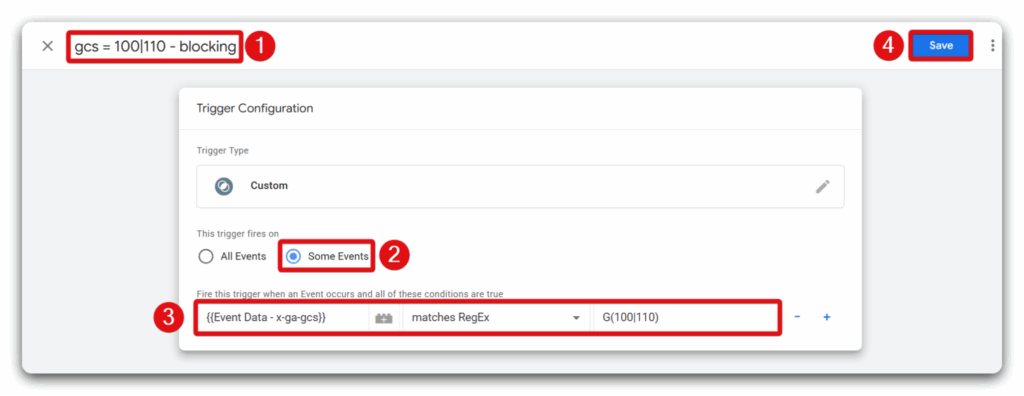
Next, set the trigger to fire on some events by choosing the Event Data – x-ga-gcs variable, selecting Matches RegEx as the condition, and entering G(100|110) as the pattern.
This setup ensures the trigger only fires when analytics consent is granted, effectively blocking tags from firing for users who haven’t provided analytics_storage consent.
Note: If you want to block a tag when ad_storage consent hasn’t been given, use G(100|101) as the regex while creating a similar trigger as the above one.
Updating the existing tags
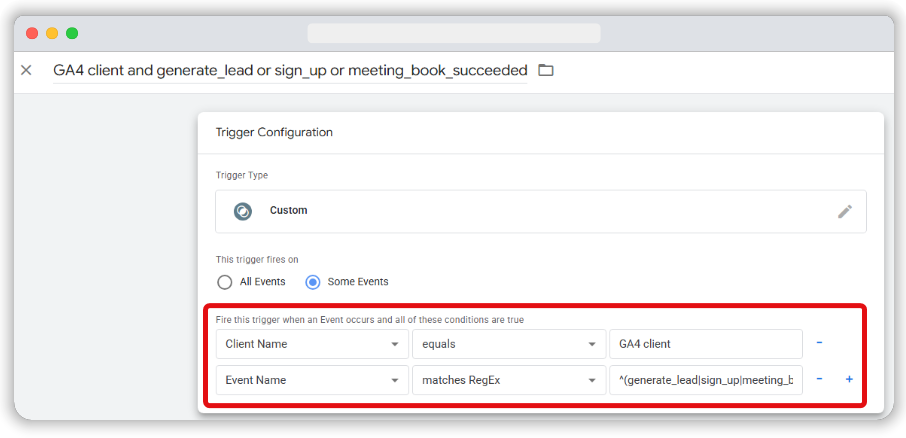
You need to update the tags with the trigger we just created. In this example, the Amplitude tag is using a GA4 event as a trigger to fire it.
Now, if consent hasn’t been given for analytics cookies, you need to block that Amplitude tag. To do that, go to the Triggering section of the tag you want to modify and click Add exception.
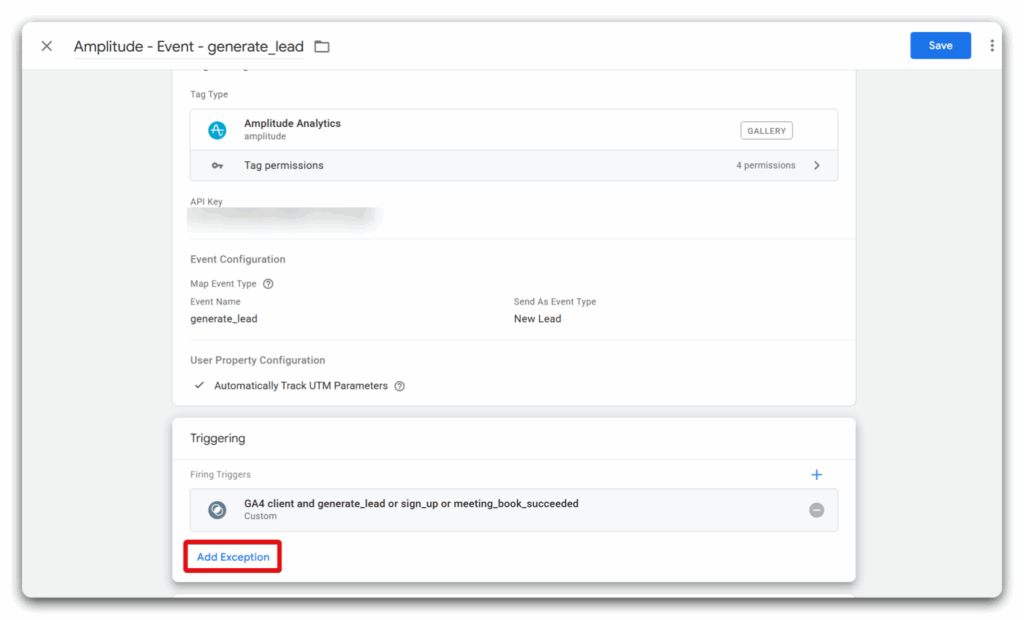
Then, select the previously created trigger that blocks tags from firing when users haven’t explicitly given consent.
Data consent is essential
Obtaining permission before collecting data is crucial for avoiding reputational damage and painful fines for consent mode noncompliance, and for building customer trust. Fortunately, there are plenty of ways you can handle this using consent management in Server-side GTM. We’ve explored three options — why not put one of our strategies into practice?