Marketers, designers, and developers need high quality data to deliver optimal online experiences and grow their businesses. A lot of that data comes from your audience and their activities on your website.
To collect that data in a way that respects data privacy laws and users’ privacy means that you need to be transparent and provide consent options. Laws like the GDPR and CCPA require you to inform people about what data you collect, how you use it, and what their rights are.
Different laws in different regions also require you to obtain user consent before collecting data, or provide granular options about what data uses that users can accept or decline, or enable them to opt out of various data uses.
Not to mention that there are an increasing number of business requirements for companies that rely on important platforms like Google’s to provide proof of consent if your company uses them for advertising, analytics, and other key marketing functions.
Smart consent management strategy with Webflow and Usercentrics enables you to meet data privacy requirements, build trust with your audience, and protect your marketing efforts and growing business.
Provide clear information and user-friendly consent options that match your brand and that are customized to where your users are located.
We look at why you need a Webflow cookie banner, how it benefits your data privacy compliance and marketing performance strategies, and how to set it up. Support customer-friendly Privacy-Led Marketing and Webflow cookie consent.
Why your Webflow website needs a cookie banner
Let’s look at why having a Webflow cookie consent banner on your website is so important for your business. Then we’ll cover the setup process.
No disruption to your Google services campaigns
Google Ads campaigns are popular among Webflow website owners for generating traffic, especially with retargeting. Government regulations aren’t the only requirements business owners need to navigate today. Large tech platforms that many businesses rely on are also implementing and enforcing privacy-centric policies.
Setting up Webflow cookie consent via Usercentrics CMP and displaying a user-friendly and privacy-compliant consent banner enables you to maintain access to Google services that your business relies on. This includes key features like Google Ads’ personalization and remarketing.
Usercentrics CMP is Gold Tier certified with Google’s CMP Partner Program, and comes with Google Consent Mode v2 built in. Start collecting and signalling compliant consent right from implementation.
Get the required consent information from your users, securely store it for regulatory requirements, and signal it via Consent Mode to Google Services. This controls the firing of tags for ads, analytics, and other services to comply with user consent requirements for users in the US, EU, and around the world.
With Google Tag Manager, it’s easy to get up and running with Usercentrics CMP on your Webflow website.
Embrace Privacy-Led Marketing
Marketing performance strategy and optimization is already a full-time job, but it grows more complex every day.
Marketers have to stay abreast of evolving privacy regulations, changes in tech platforms’ policies and functions, the expectations of customers and prospects, and more.
The risks of data breaches and other privacy violations go far beyond just fines and legal penalties.
They can irreparably damage your brand reputation and customers’ trust. They can require time- and resource-consuming remediation activities, like ongoing audits. And they can discourage potential new customers, partners, investors, and advertisers.
Your Webflow cookie consent banner can be a powerful tool, especially combined with a clear Webflow cookie policy, to enable you to achieve and automate privacy compliance, and maintain access to the business platforms you rely on.
Plus, you keep your customers happy that their privacy concerns are being addressed. Which means higher long-term engagement and more valuable data to boost your marketing efforts.
Steps to add a cookie banner to your Webflow website
We will walk you through the steps to ensure you have the accounts and access you need, and that your tags are set up to respond to consent signals correctly.
Set up your Google Tag Manager account
The easiest and most streamlined way to set up and control services on your Webflow website is by using Google Tag Manager to conditionally load scripts.
If you have a Google Tag Manager account already, you’re all set to get started. If not, create one for free.
Once your account is active, you can use it to set up Usercentrics CMP and to configure the tags that require user consent. Next we’ll cover the Usercentrics CMP setup and customization, then later we’ll get back to Webflow and how to add the CMP to your account.
You can refer to our Usercentrics CMP setup guide as well.
Sign up for your Usercentrics account
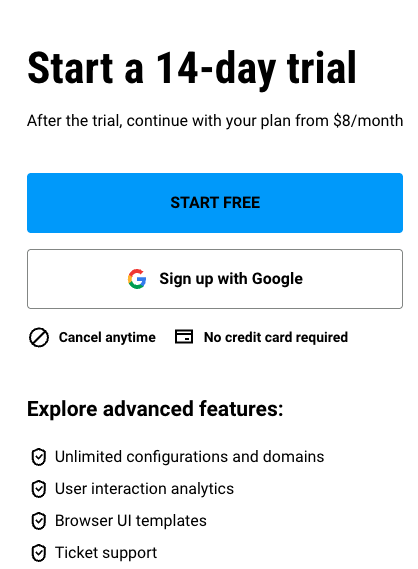
Go to the Free Trial page, then click the Usercentrics Web CMP tab. Click START FREE to get started with your 14-day free trial by providing the required information to set up your
Usercentrics account.
Configure your banner in the Usercentrics Admin Interface
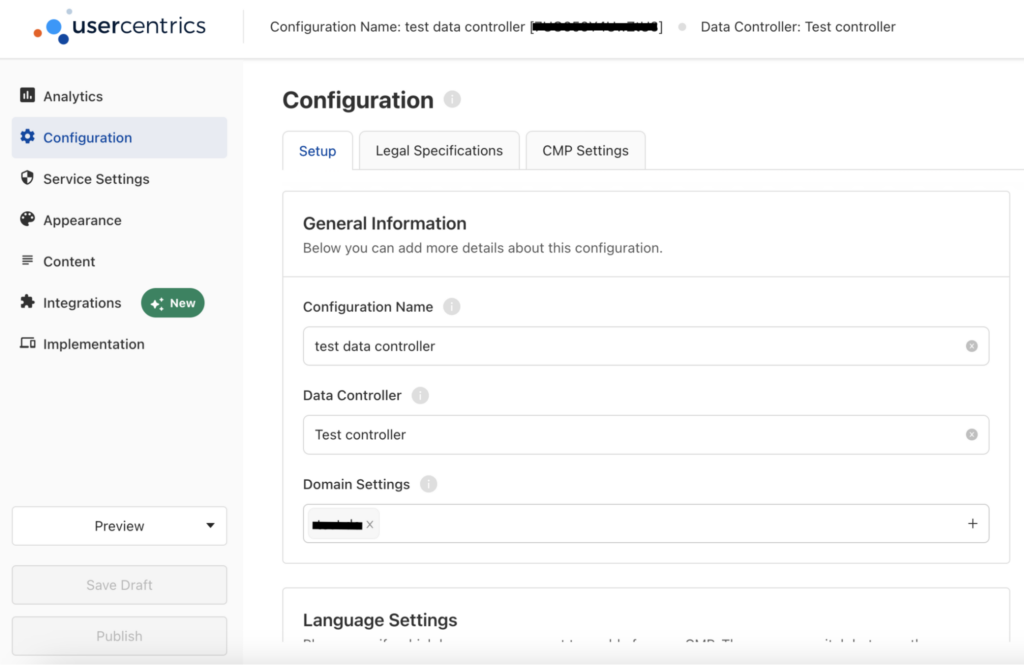
Once your new account is set up (or you’re logged in if you already have an account), it’s time to set up your configuration. In the Admin Interface, click Configuration. This section is where you’ll add information about your domain (your Webflow site), where you’ll display the banner, your language preferences, and more.
Initial website scan
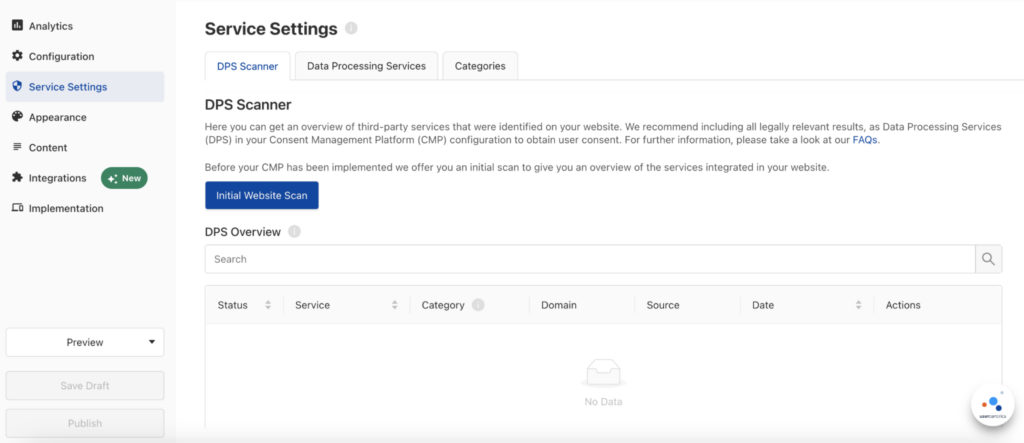
In the Admin Interface, click Service Settings, then click the Initial Website Scan buttonto start the first scan of your Webflow website. This will detect the cookies and trackers (Data Processing Services, or DPS) that are in use.
Once the scan is completed, it will generate your scan report, which you can see under the DPS Overview.
Categorize the Data Processing Services
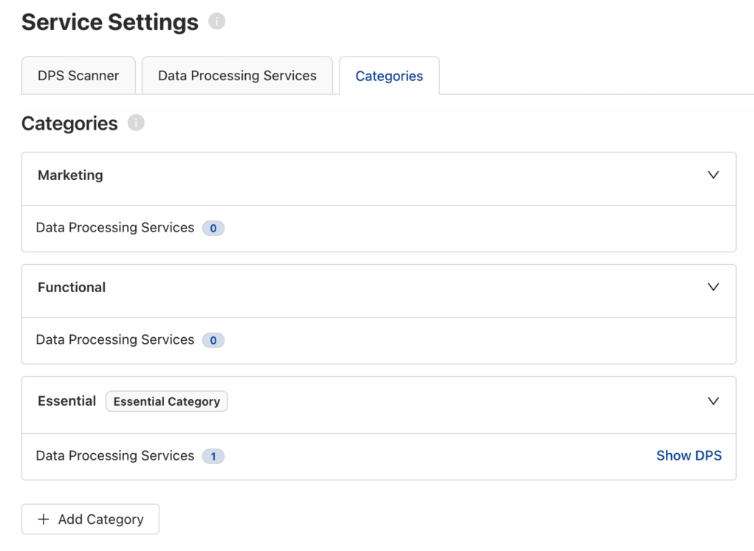
Usercentrics CMP will automatically categorize the DPS for you that were detected in the initial scan. Essential, Functional, and Marketing are included by default. You can edit the classifications, or manually categorize anything that comes up as unclassified. You’ll do that under Service Categories, which includes predefined categories or enables you to define your own.
Add the Data Processing Services
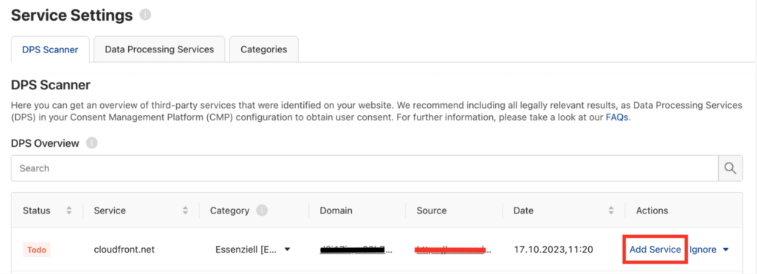
Use the list of DPS from the initial scan report to add all the relevant cookies and other trackers in use on your website. Click Add Service to the right of each DPS listing in the Admin Interface.
This will add them to the CMP, enabling users to access and control their consent preferences by category. Your list of DPS can also be added to your Cookie Declaration.
Note: Scripts for the DPS may need to be adjusted to enable blocking until consent is obtained. Get more information in our guide.
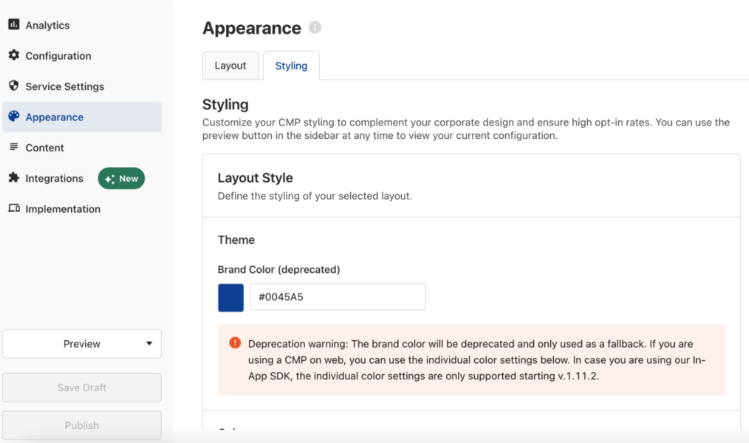
Customize the appearance of your consent banner
Click the Appearance tab to get started customizing how your consent banner will look. Under the Styling tab you can adjust the brand styling, fonts, logos, and more.
Under the Layout tab you can customize the settings for the banner’s first and section layer settings and the Privacy Trigger. That’s a shortcut that visitors can use to update their consent preferences on future visits to your website.
Click the Content tab to start customizing the text, links, and other elements that users will see and read on your consent banner. Usercentrics CMP supports 60 languages, and you can customize the banner here for relevant legal frameworks, like the “Do Not Sell or Share My Personal Information” link required by the CCPA.

Implement the Usercentrics CMP on your Webflow website
Now you will add the Google Tag Manager snippet to your Webflow website. Please note that you will need a Basic, CMS, or Business Webflow account in order to be able to add scripts to your Webflow website.
Login to your Webflow account and ensure that you are in Design mode. You can select this at the top left of the menu. Click the + button to open up the menu of options you can add, then scroll down to the Advanced section. Click on Code Embed.
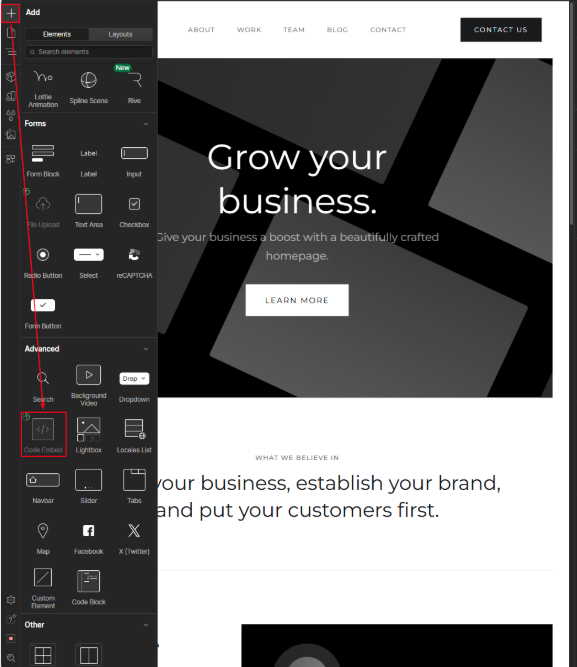
Add your Google Tag Manager snippet. You must replace “GTM-XXXXXX” in the last line with your own Google Tag Manager Container ID.
If you exclusively use Google Tag Manager to load third-party scripts, remember to configure them to require “additional consent” so cookies will be set without prior consent if that regulatory requirement is relevant to your business and website.
<!-- Google Tag Manager -->
<script>(function(w,d,s,l,i){w[l]=w[l]||[];w[l].push({'gtm.start':
new Date().getTime(),event:'gtm.js'});var f=d.getElementsByTagName(s)[0],j=d.createElement(s),dl=l!=’dataLayer’?’&l=’+l:”;j.async=true;j.src=
‘https://www.googletagmanager.com/gtm.js?id=’+i+dl;f.parentNode.insertBefore(j,f);
})(window,document,’script’,’dataLayer’,’GTM-XXXXXX’);</script>
<!– End Google Tag Manager –>
Monitor your cookie and tracker usage regularly
The Usercentrics CMP runs a daily website scan and automatically sends the report to your inbox when it’s complete. We recommend regularly checking your scan report to make sure all the cookies and other tracking technologies in use on your site are correctly classified and have a purpose description.
Marketing operations evolve quickly, so this is one way to stay ahead and make sure only the cookie categories that your users have consented to are activated. The scanner also automatically updates your Cookie Declaration to accurately reflect your Webflow website’s cookie usage.
Usercentrics CMP helps protect your business and grows with you
Usercentrics CMP makes it easy for you to meet regulatory requirements no matter where you do business. Keep your customers informed about your data processing and their privacy rights to build trust.
Also stay on top of the cookies and other tracking technologies that you’re using to collect data, so you can provide accurate information and valid consent options, and compliantly control your data collection and use. Build a Privacy-Led Marketing strategy that scales.
In just a few steps, you can set up a cookie banner on your Webflow website that looks great, is user-friendly, and helps protect your business. Check out our opt-in optimization whitepaper for more information about optimizing user experience and consent rates.
Show customers that you respect their privacy, get the high quality marketing data you need, and get automated peace of mind regarding your legal obligations.

Join our growing community of data privacy enthusiasts now. Subscribe to the Usercentrics newsletter and get the latest updates right in your inbox.