Marketing measurement is becoming more complex.
For years, marketers relied on a relatively simple assumption: if someone clicked an ad and completed a purchase, their marketing tools would record the event. Analytics platforms captured conversions, attribution models assigned credit, and advertising algorithms used that data to optimize campaigns.
Today, that assumption no longer holds.
Browser restrictions, consent choices, ad blockers, and platform policy changes are reducing how much data marketing platforms receive. As a result, marketing teams are experiencing growing gaps in their reporting. Conversions appear lower than expected, attribution models feel incomplete, and campaign optimization becomes more difficult.
But the need to demonstrate marketing performance hasn’t changed. Teams still need reliable insights to understand which channels drive revenue and where budgets should be allocated.
Organizations now need to rethink how marketing data is collected, processed, and delivered across their analytics and advertising systems. One approach gaining significant attention is server-side tracking.
Server-side tracking introduces a different architecture for managing marketing data. Instead of sending tracking events directly from a user’s browser to multiple platforms, the data is first routed through a controlled server environment. From there, it can be processed and forwarded to analytics and advertising tools.
One of the most common implementations is Server-Side Tagging using Server-Side Google Tag Manager (sGTM).
For marketers, this approach strengthens control over first-party data, improves signal reliability, and helps stabilize marketing measurement as privacy laws and user expectations change.
At a glance
- Server-side tracking improves how marketing data is collected and delivered to analytics and advertising platforms.
- Server-Side Tagging provides a structured way to implement server-side tracking using Server-Side Google Tag Manager.
- Browser restrictions, consent choices, and tracking protections are contributing to increasing signal loss.
- Platforms such as Google Analytics 4, Google Ads, and Meta Ads rely on reliable conversion signals for optimization.
- Server-side tracking supports more stable marketing measurement.
Why marketing measurement is changing
Marketing teams today operate in a data environment that looks very different from that of just a few years ago. Several industry shifts are reshaping how marketing data can be collected, processed, and activated. These shifts are why server-side tracking is becoming increasingly relevant for modern marketing infrastructure.
Privacy expectations are reshaping data collection
People are becoming more aware of how their data is collected and used online. Transparency is becoming an effective way to build digital trust. In the State of Digital Trust report, 44% of consumers say transparency about data use is the most important factor in whether they trust a brand. Meanwhile, 62% say they feel they have “become the product” in the digital economy, signaling growing suspicion towards organizations that don’t earn trust.
At the same time, privacy regulations and platform policies are encouraging organizations to design digital experiences that respect user choice and consent.
Marketers must now balance two priorities:
- Maintaining visibility into marketing performance
- Respecting user consent and privacy expectations
One solution is to adopt Privacy-Led Marketing, an approach in which data practices are designed with transparency and trust in mind from the beginning.
Consent now influences marketing performance
User consent now directly affects how much marketing data reaches analytics and advertising platforms.
When someone visits a website, they may be asked whether they agree to specific types of tracking. If they consent, platforms like Google and Meta can receive data about their actions. If they decline, those signals may never reach marketing systems.
Consider the following scenario:
- 100 users complete a purchase on a website
- 60 users consent to tracking
- 40 users decline
Marketing platforms may only record 60 conversions, even though 100 purchases were made. From a reporting perspective, it may appear that campaign performance declined, even though actual revenue stayed the same.
Browser restrictions are reducing tracking visibility
Modern browsers increasingly include built-in tracking protections designed to limit third-party tracking technologies. These protections can interfere with browser-based tags or prevent certain data from reaching analytics platforms.
Common causes of signal loss include:
- Ad blockers
- Browser tracking prevention features
- Cookie restrictions
- Network filtering technologies
When these mechanisms interrupt browser-based tracking scripts, conversion events may never reach the marketing platforms responsible for measuring performance.
The signal loss problem in marketing measurement
The combined impact of consent choices, browser protections, and tracking limitations has created a challenge known as signal loss.
Signal loss occurs when user interactions that should be recorded, such as purchases, form submissions, or sign-ups, never reach analytics or advertising platforms. It can result in several measurement challenges:
- Underreported revenue in analytics tools
- Weaker signals for advertising algorithms
- Incomplete attribution insights
- Fragmented marketing performance data
Many organizations are now focusing on improving signal integrity, which refers to the reliability and consistency of marketing data signals.
Server-side tracking can help improve signal integrity because it’s a more controlled way to process and deliver event data.
What is server-side tracking?
Server-side tracking changes how marketing data flows from a website to analytics and advertising platforms.
In traditional tracking setups, tags run directly in the user’s browser. When someone performs an action, such as completing a purchase or submitting a form, the browser sends the event data directly to the relevant platforms.
Server-side tracking introduces an additional processing layer. Instead of sending events directly to marketing platforms, the browser sends them to a server container first. The server container processes the data and forwards it to analytics and advertising platforms.
One of the most common implementations is Server-Side Tagging with Server-Side Google Tag Manager (sGTM).
Client-side vs server-side tracking
Here’s what the data flow looks like in each setup:
Client-side tracking
Browser → Marketing platforms
Server-side tracking
Browser → Server container → Marketing platforms
This additional layer gives businesses greater control over how event data is processed before it reaches external tools.
| Feature | Client-side tracking | Server-side tracking |
| Data processing | Browser | Server environment |
| Signal reliability | Can be blocked | More resilient |
| Data control | Limited | Higher |
| Data filtering | Difficult | Possible |
| Data enrichment | Limited | Possible |
How server-side tagging improves marketing measurement
Server-side tracking improves how marketing signals are delivered to analytics and advertising platforms. Server-Side Tagging provides the infrastructure to route events through a server container before sending them to marketing tools. This architecture supports more consistent signal delivery.
Improving signal delivery to advertising platforms
Advertising platforms rely heavily on conversion signals to optimize campaigns.
When these signals are incomplete, optimization algorithms cannot perform effectively.
Server-side tracking improves signal reliability by delivering events through server infrastructure so you’re not relying entirely on browser-based tracking.
Example: Meta Conversions API
Many businesses measure Meta campaign performance using the Meta Pixel. However, browser restrictions may prevent pixel events from reaching Meta.
With server-side tracking, businesses can send events through the Meta Conversions API, delivering conversion signals directly from server infrastructure.
This can help:
- Recover missing conversion signals
- Reduce duplicate events
Improve campaign optimization signals
[H3] Improving Google Analytics 4 measurement reliability
Google Analytics 4 (GA4) uses an event-based data model.
If events fail to reach GA4 because of browser limitations, analytics reports may not fully reflect what is happening on the website.
With Server-Side Tagging using sGTM, events can be routed through a server container before reaching GA4.
Instead of:
Browser → GA4
The data flow becomes:
Browser → Server container → GA4
This architecture provides greater control over how event data is processed and delivered.
[H3] Improving campaign optimization across platforms
Many advertising platforms use conversion signals to optimize campaigns, such as:
- Google Ads
- Meta Ads
- TikTok Ads
- LinkedIn Ads
Server-side tracking supports these platforms by delivering more consistent conversion signals, which helps optimization systems to work more effectively.
Where Server-Side Tagging fits in the modern marketing stack
Modern marketing measurement infrastructure consists of several interconnected layers.
Server-Side Tagging acts as a central processing layer that connects websites, analytics platforms, and advertising tools.
Consent management layer
A consent management platform collects user consent and communicates those choices to marketing systems.
Server-side tagging layer
Server-side tagging layer
The Server-Side Tagging layer processes event data before sending it to marketing platforms.
This enables businesses to:
- Filter events
- Apply consent rules
- Remove duplicate signals
- Enrich events with first-party data
Marketing platforms
Processed signals are delivered to tools such as:
- Google Analytics 4
- Google Ads
- Meta Conversions API
- TikTok Ads
Data storage and analytics
Some organizations also send event data to data warehouses, such as:
- Google BigQuery
- Snowflake
- Amazon Redshift
Marketing teams can then combine marketing data with other business datasets.
When should marketers consider server-side tracking?
Organizations may benefit from server-side tracking if they’re experiencing:
- Declining attribution accuracy
- Missing conversion data
- Heavy reliance on paid advertising
- Increasing signal loss on analytics platforms
Businesses that are investing heavily in digital marketing often explore Server-Side Tagging as a way to strengthen their measurement infrastructure.
Server-side tracking and the future of marketing measurement
Marketing measurement is evolving. Instead of attempting to capture every interaction, organizations need to focus on building systems that prioritize reliable, consent-aware data.
Server-side tracking plays an important role in this transition. Implementations such as Server-Side Tagging using sGTM help businesses maintain stronger control over how marketing signals are processed and delivered.
For modern marketing teams, this approach is becoming a foundational component of their marketing measurement infrastructure.
Most people building a Wix website are focused on the design, the content, and getting it live. The privacy policy tends to come last, if it comes at all. But if your site collects any kind of visitor data, which most do, a privacy policy isn’t a formality. It’s generally required under major privacy regulations, and the absence of one can create regulatory and trust risks.
Below, you’ll find a practical walkthrough of what your Wix privacy policy should include and how to implement it correctly.
At a glance
- Most Wix sites collect personal data in some form, which triggers privacy policy requirements under laws like the General Data Protection Regulation (GDPR) and the California Consumer Privacy Act (CCPA).
- Wix’s own privacy policy covers Wix as a platform, not your website. You are responsible for your own.
- The laws that apply depend on where your website visitors are, not where you are located.
- A privacy policy and a consent banner serve different legal purposes, and you likely need both.
- The Usercentrics Privacy Policy Generator offers a free, regulation-ready starting point that can be embedded directly on your site.
What data does a typical Wix website collect?
Wix is widely known as a user-friendly, all-in-one website builder. Its intuitive tools, accessible pricing, and global user base make it a common choice for small businesses launching their online presence.
What many site owners don’t realize is that even a straightforward Wix site can process a wide range of personal data. Understanding what’s collected is the first step in determining what a privacy policy needs to address.
For example, contact forms typically capture names, email addresses, and any information a visitor chooses to share. If you run an online store, this extends to billing details, shipping addresses, and purchase history. Booking or scheduling tools also process personal information linked to specific interactions.
In addition, tracking technologies collect technical and behavioral data. Analytics tools record information such as IP addresses, browser type, device details, pages visited, and time spent on the site. Advertising pixels from platforms like Meta or Google support audience building and conversion tracking. Even embedded content, including videos or maps, can enable third-party data collection.
Much of this processing happens automatically, without active input from the visitor. This is why data protection laws require clear transparency about what is collected and how it is used.
Does my Wix website need a privacy policy?
The short answer is yes, you will generally need a privacy policy for your Wix website. The reason comes down to a distinction that often surprises site owners.
Wix’s privacy policy applies to Wix as a platform provider, not to your business. It explains how Wix processes data, but it does not cover how your website collects or uses visitor information. That responsibility sits with you, which means you need to publish your own privacy policy.
The laws that apply are determined by where your visitors are located, not where your business is based. You do not need to operate from the EU for the GDPR to apply. If people in EU Member States visit your site, the regulation can apply to your data processing. A similar principle applies to US laws such as the CCPA for California residents and the California Online Privacy Protection Act (CalOPPA) for commercial sites accessible to users in California. Serving visitors across borders does not remove your regulatory obligations.
Many common website features trigger these obligations. Contact forms, newsletter signups, analytics tools, cookie-based tracking, e-commerce functionality, and user accounts all involve processing personal data. If your site includes any of these, a privacy policy is generally required.
Privacy policy vs. consent banner: what’s the difference?
Many website owners assume that if they have a consent banner, they don’t need a privacy policy. However, each item serves a distinct legal purpose.
- A privacy policy is a document that explains what data you collect, why you collect it, how you use it, and what rights visitors have over it. It’s a disclosure, and it needs to be accessible on your site at all times.
- A consent banner is an active mechanism. It appears when someone visits your site, informs them about cookie use, and collects their consent before tracking begins. It’s how you obtain and record permission, rather than simply disclosing that tracking happens.
Most sites subject to the GDPR or the CCPA need both. They work together, but neither replaces the other.
What must a Wix privacy policy include?
Now that we’ve clarified why you need a Wix privacy policy, the next step is understanding what your privacy policy itself must cover. While the GDPR and the CCPA have different legal frameworks, their disclosure requirements overlap significantly.
A single, well-structured policy can address both data privacy laws by covering the areas below.
Who you are and how to contact you
Start by identifying the business or individual operating the website and providing up-to-date contact details. Include a dedicated contact method for privacy or data protection requests so visitors know where to direct inquiries.
What personal data do you collect
Next, describe the categories of personal data you collect. This typically includes information provided directly by users, such as names or email addresses, as well as technical and behavioral data collected through cookies, analytics, or embedded services.
How do you collect personal data
Explain the collection methods in practical terms, for example, through forms, account creation, purchases, tracking technologies, or integrations with third-party tools. This helps users understand when data collection occurs.
Why do you collect and use this data
Outline the purposes for processing, such as providing services, processing transactions, responding to inquiries, improving site performance, or marketing.
For GDPR coverage, also state the legal bases you rely on, such as consent, contract performance, or legitimate interests.
How long do you retain data
Provide retention periods or the criteria used to determine them. Users should be able to understand whether data is stored temporarily, for the duration of a contract, or for a defined legal or operational period.
Third-party sharing and disclosures
List the categories of third parties that receive personal data, such as hosting providers, analytics services, payment processors, or marketing platforms.
For CCPA, clarify whether any data sharing qualifies as a “sale” or “sharing” under the law and explain how users can opt out if applicable.
User rights and how to exercise them
Explain the rights available to visitors and how they can submit requests.
Under the GDPR, this includes rights such as access, rectification, erasure, restriction, portability, and objection.
Under the CCPA, this includes the right to know, delete, correct, and opt out of the sale or sharing of personal information, as well as the right not to be discriminated against for exercising these rights.
Cookies and tracking technologies
Lastly, describe, at a high level, the measures used to protect personal data. If you process payments or other sensitive information, include relevant disclosures about secure processing and safeguards.
How to create a privacy policy for your Wix website?
A Wix website privacy policy needs to include the above nine aspects, and to create a compliant Wix privacy policy, companies have three different options. Each has different levels of effort and risk depending on how tailored you need the policy to be.
Option 1: Use the Usercentrics Privacy Policy Generator
The Usercentrics Privacy Policy Generator creates a policy based on how your site actually processes data. You answer questions about the information you collect, the tools you use, and where your visitors are located. The result is a policy aligned with your setup rather than a generic template.
The free plan covers GDPR and CCPA requirements. The paid plan extends coverage to the Children’s Online Privacy Protection Act (COPPA) and additional US state laws and includes updates as regulations change. For most Wix site owners, this is a practical and efficient option.
Once generated, you can add the policy to your site as a dedicated page.
Option 2: Use Wix’s built-in privacy policy template
Wix offers a basic Wix website privacy policy template in the dashboard under Settings > Privacy & Cookies. It provides a starting structure and reflects common data collection scenarios.
However, it is not tailored to your specific tools, data practices, or legal obligations. It works best as a draft that you review and expand with details relevant to your site.
Option 3: Write your own from scratch
Creating a policy from scratch is only advisable if you have legal expertise or professional support. Privacy laws set clear disclosure requirements, and gaps, even unintended ones, can create risk.
For most site owners, using a generator or getting a legal review is a more reliable approach.
How to add a privacy policy page to your Wix site?
Once you have your privacy policy document, adding it to your Wix site takes only a few steps:
- Create a new page in your Wix editor and title it something clear and findable, such as “Privacy policy” or “Privacy notice.”
- Paste your policy content into the page, making sure the formatting is clean and the text is easy to read on both desktop and mobile.
- Hit “publish”.
If you used the Usercentrics Privacy Policy Generator, you can embed the policy directly using the provided embed code, which means your policy updates automatically when the document changes rather than requiring you to manually update the page each time.
Once the page is live, make sure it’s excluded from any password protection or members-only access settings. Your privacy policy needs to be publicly accessible at all times, not gated behind a login.
Where to display your privacy policy on Wix?
Having a privacy policy page is only part of the requirement. Regulations and common best practices both expect it to be easy for visitors to locate and review before their data is collected.
Therefore, a common place to link a Wix privacy policy is a website’s footer because it appears consistently across your site and is where users expect to find legal information. Add a clearly labelled link such as “Privacy policy” rather than a broader label like “Legal” or “Terms.” The link should lead to a dedicated page that is accessible on both desktop and mobile, so visitors can return to it whenever they need.
There are also moments where visibility matters most. Contact forms and newsletter signups should reference the privacy policy close to the submit button so visitors understand how their data will be used before sharing it. For e-commerce sites, the same principle applies within the checkout flow, where personal and payment details are provided.
If you use a cookie banner, include direct links to both your privacy policy and cookie policy. This supports transparency expectations and helps users access more detailed information at the point where consent choices are presented.
Do you have a Wix website? Learn how to set up a cookie banner for your site.
Keeping your Wix privacy policy up to date
A privacy policy is not a static document. As your website evolves, so do the tools you use, the data you process, and the regulations that apply. Any of these changes can make an existing policy incomplete if it is not reviewed regularly.
Therefore, aim to revisit your policy whenever you introduce a new third-party service, adjust how you collect or use personal data, or start serving audiences in new regions with different legal requirements. Even without visible changes, an annual review is a sensible baseline, as regulatory guidance and expectations continue to develop.
If you created your policy using the Usercentrics Privacy Policy Generator on a paid plan, updates driven by regulatory changes are applied automatically. This reduces ongoing maintenance, but it’s still a best practice to review the policy when your own data practices change so it continues to reflect your setup accurately.
When updates are made, consider informing existing users or subscribers, especially if the changes affect how their data is processed. Under the GDPR, significant changes may also require obtaining renewed consent.
Turn your Wix privacy policy into action
A clear, accurate Wix privacy policy shows visitors what happens to their data and why. It sets expectations, outlines their rights, and documents your responsibilities. For most Wix site owners, that alone is a major step toward compliance.
The next step is making sure your site’s behavior matches what your policy says. If you reference cookies, analytics, or marketing tools in your privacy policy, your Wix setup should reflect that in practice. Aligning documentation and implementation helps reduce risk and builds trust with your audience.
If you are using Wix, you can extend your setup with a consent solution that works directly within your site environment, so your privacy policy is supported by the right technical controls.
It’s launch day, and your campaign is ready to go live with precise targeting, powerful creative, and a landing page designed to convert. Then someone on the compliance side flags it because a data source needs consent documentation. The retargeting list was built before the right permissions were in place. So the campaign is paused while the marketing team resolves it.

This scenario is far from unusual and represents one of the most common friction points between marketing operations and GDPR compliance requirements. GDPR responsibilities don’t solely reside with the legal department.
GDPR compliance affects every stage of how marketing teams operating in the European Union collect, use, and act on personal data. Understanding where those boundaries sit separates teams that move quickly (but with risks) from teams that move quickly while remaining privacy-compliant.
This guide explains how the GDPR affects marketing, from who owns the processes to which legal bases you can use and how to build GDPR-compliant workflows.
At a glance
- The GDPR sets clear rules on how marketing teams collect, store, and use personal data. Consent is required in many cases, but not all.
- Different marketing team roles — from copywriters to data analysts — carry different privacy compliance responsibilities.
- Legitimate interests and contractual necessity are valid legal bases alongside consent. Knowing which one may apply to your activities matters.
- The most common GDPR mistakes in marketing are avoidable with the right processes in place.
- Noncompliance carries significant fines, but the reputational damage can last longer than financial or operational penalties.
Why the GDPR matters for marketers
The EU’s General Data Protection Regulation (GDPR) doesn’t just regulate data collection or storage. It directly shapes marketing data access and protection practices, from the moment a visitor lands on a website to the email they receive days later.
For marketing teams, this means every touchpoint that involves personal data needs a lawful basis. That includes tracking pixels, retargeting campaigns, email lists, and analytics tools. The regulation doesn’t distinguish between “marketing data” and other categories. If it’s personal data, the GDPR applies.
But understanding how the GDPR affects marketing goes beyond simply avoiding penalties. It changes how digital marketers build and execute campaigns. For instance, targeting capabilities may narrow when consent isn’t obtained, and attribution models can break when tracking is restricted.
These realities force marketing teams to rethink strategies around first-party data, transparency, and trust-based audience relationships.
Learn how to collect and use first-party data for personalization.
The upside? When marketing teams integrate GDPR compliance into their workflows from the start, they build campaigns that audiences actually want to engage with. GDPR compliance marketing isn’t a box-ticking exercise. It’s a way of earning customer trust, which is the foundation of sustainable marketing performance.
What are the legal bases for processing data for marketing teams?
Under the GDPR, every piece of personal data processed requires a legal basis. There are six in total, but three are used most frequently in marketing contexts. Understanding which basis applies to each activity is critical because it determines what obligations a company has and what rights users can exercise.
The three most relevant legal bases for GDPR marketing are consent, legitimate interest, and contractual necessity. Each carries different requirements and applications.
Consent
This is the most straightforward legal basis. The individual is informed and clearly agrees to have their data collected for a specific purpose. GDPR marketing consent must be informed, freely given, and easy to withdraw. Cookie banners and email sign-up forms are common places where this applies.
Learn more about how consent-based marketing can strengthen your customer relationships.
Legitimate interest
Processing data sometimes serves a genuine business need that doesn’t require explicit consent, provided it doesn’t override individual rights. Sending a transactional email after a purchase, for example, may fall under this basis.
But using it as a shortcut for GDPR digital marketing campaigns is a common mistake, and companies choosing this legal basis need to be prepared to justify it.
Contractual necessity
If processing personal data is necessary to fulfil a contract with the user, that’s a valid basis. This tends to come up more in e-commerce and service delivery rather than pure marketing activity. For instance, you can process a customer’s address to ship a product they ordered, but you can’t use that address for unrelated marketing communications without separate consent.
The key is matching the right legal basis to the right activity, and it’s possible for your company to perform different marketing activities that fall under different legal bases. Misjudging this is one of the most common ways marketing teams end up noncompliant with the GDPR.
Who is responsible for GDPR compliance in marketing teams?
Responsibility for GDPR compliance among marketers depends on the size, nature, and structure of your business, but there are specific obligations regarding marketing and the GDPR that apply across the board.
In smaller organizations, one person might wear multiple hats. In larger teams, compliance responsibilities are often distributed across several roles. Either way, clarity on who owns what prevents gaps that could lead to violations.
Data Protection Officer
A Data Protection Officer (DPO) is responsible for ensuring personal data is processed in line with GDPR requirements. The role is legally required in some organizations, depending on operations, and can be filled internally or by an external provider. Having a DPO in place signals commitment to privacy-led practices, which builds trust with both customers and partners.
The DPO’s responsibilities typically include:
- Creating and regularly reviewing data privacy policies and standards
- Handling data subject requests promptly and securely
- Monitoring ongoing GDPR compliance across your organisation
- Maintaining detailed records of processing activities
- Reporting data breaches to the relevant authority and notifying affected individuals
- Training staff on GDPR compliance and data protection on an ongoing basis
Data controller and data processor
The data controller decides why and how personal data is processed. The data processor acts on the controller’s behalf, carrying out instructions and processing activities.
In most cases, the business is the controller, and the tools and platforms used for marketing are processors. Understanding this distinction matters because each role carries different GDPR obligations.
As the controller, the business is responsible for ensuring any processor meets GDPR standards. This includes reviewing data processing agreements, confirming appropriate security measures exist, and ensuring processors only handle data according to instructions provided.
Learn more about joint controllership under the GDPR — benefits and obligations.
Legitimate business interest
When marketing teams rely on legitimate interest as a legal basis, the responsibility for justifying that interest sits with the data controller. Marketing teams cannot simply claim legitimate interest without documenting why the processing is necessary and why it doesn’t override users’ rights.
In practice, this often falls to the marketing manager or head of marketing in collaboration with legal or compliance teams. Conducting a Legitimate Interest Assessment before starting any campaign that relies on this basis is essential. Without that assessment, the legal basis may not withstand scrutiny.
How GDPR responsibilities are spread across marketing roles
GDPR marketing compliance isn’t the sole responsibility of one team or role. Compliance touches almost every function within a marketing organization. Anyone who handles personal data, creates campaigns that rely on it, or designs systems that collect it plays a part in maintaining compliant operations.
Here’s how those responsibilities break down across common marketing roles:
DEVELOPERS
Implement consent mechanisms, ensure data flows are tracked, and maintain secure integrations with third-party tools.
DATA ANALYSTS
Work only with data that has been lawfully collected. They need to understand consent status before running any analysis.
GRAPHIC DESIGNERS
Design consent flows and privacy-related UI that is clear and accessible, not buried or confusing.
COPYWRITERS
Write privacy notices, consent language, and marketing copy that is transparent about data use without being alarmist.
PR
Ensure any public-facing statements about data practices are accurate and aligned with actual compliance standards.
EVENT TEAM
Collect attendee data lawfully, including obtaining consent for any marketing follow-ups after an event.
DIGITAL MARKETERS
Manage GDPR online marketing channels like paid ads, social, and search with consent-aware targeting.
MARKETING OPERATIONS
Own marketing systems and workflows, e.g., CRM systems, email platforms, and automation tools. Support data collection, routing, retention, and permissions alignment with consent choices and policies.
The GDPR compliance checklist for marketers
GDPR compliance in marketing requires deliberate action across multiple processes. The following checklist provides a framework for establishing and maintaining compliant data practices.
1. Audit your data sources
Identify where personal data enters the marketing stack and why. Assigning a legal basis to a data process requires first identifying that process. Start with daily-use tools: CRM systems, ad platforms, analytics suites, and email providers.
This audit should document:
- What data is collected at each touchpoint
- Which systems store and process that data
- How long data is retained and how it’s deleted/anonymized
- Who has access to data (and at what levels)
- What purposes is data used for
Without this foundation, compliance efforts lack the visibility needed to be effective.
2. Assign a legal basis to each data process
Consent, legitimate interest, and contractual necessity each carry different obligations. Document which basis applies to each activity. If the reason for processing a piece of data cannot be clearly stated, that represents a compliance gap worth addressing.
For each data process, record:
- The specific legal basis being used
- Why is that basis appropriate
- What obligations it creates
- What rights individuals have and how they can exercise them
This documentation protects your organization if regulators ask questions or if individuals submit rights requests.
3. Make consent easy to give and withdraw
The GDPR requires that consent be as easy to withdraw as it is to give. No pre-ticked boxes. No opt-out buried three clicks deep. If current consent flows don’t pass that test, they need to be redesigned.
For best practices, also make it equally easy to change consent preferences at a granular level, any time without fully revoking them.
Effective consent mechanisms:
- Use clear, plain language
- Separate different categories for consent (e.g., analytics vs. marketing)
- Provide granular controls
- Remember preferences across sessions (and devices)
- Make consent withdrawal equally simple
Learn more about the different types of consent.
4. Keep records of processing activities
This is a direct GDPR requirement, not merely good practice. Records protect organizations if data protection authorities ask questions or if individuals submit access requests. Keep them updated as marketing activities change.
Processing records should include:
The processing purposes
Categories of data subjects
Categories of personal data processed
Categories of data recipients
Cross-border data transfers
Retention periods
Security measures
5. Train your team
Anyone who handles personal data needs to understand their responsibilities. This includes people who might not think of themselves as “data people.” A copywriter setting up an email sequence or a designer building a sign-up form both interact with personal data, and access controls are not enough on their own.
That’s why training that covers the basics of GDPR advertising responsibilities and how to handle data subject requests is crucial. Regular refreshers help ensure that knowledge stays current as regulations, technologies, and practices evolve.
6. Review your third-party tools
Every marketing platform processes personal data on behalf of the organization. Check their privacy policies and data processing agreements. If a vendor cannot clearly explain how their tool or system handles and protects user data, that represents a risk worth addressing before it becomes a problem.
For each third-party tool, verify:
A valid data processing agreement exists
Appropriate security measures are in place
Sub-processors are documented
Data transfer mechanisms comply with GDPR requirements
Breach notification procedures are clear
7. Respond to data subject requests quickly
Individuals have the right to access, correct, or delete their personal data, and under the GDPR, organizations have 30 days to respond to these requests. It’s not enough to react once a request arrives — teams need a clear process in place ahead of time. This means defining who owns the request, how the requester’s identity is verified, how it will be tracked, and which systems need to be updated to fulfill it accurately and completely.
Marketing teams are often the first point of contact when someone reaches out, so they should know exactly how to handle inquiries and escalate them if necessary.
8. Test your GDPR email marketing flows end-to-end
Unsubscribe options, consent records, and data retention policies need to work correctly in practice, not just on paper. Run through email sequences as recipients would experience them. Gaps tend to appear in the details.
For instance, each unsubscribe link should function reliably, and any preference changes must take effect immediately. Confirmation emails need to convey accurate information, and data should be deleted promptly when requested.
At the same time, consent status has to stay in sync across all systems, ensuring that every interaction reflects the user’s choices consistently.
Learn more about the GDPR, email marketing, and how to navigate compliance.
Common GDPR mistakes marketers make and how to avoid them
Even well-intentioned marketing teams can fall into regulatory compliance traps. Understanding these common errors helps prevent them.
Assuming consent is always needed
Consent is the most well-known legal basis, but it’s not the only one. Defaulting to consent for every data process can create unnecessary work. Legitimate interest or contractual necessity may be more appropriate in some cases, but whichever basis is chosen must be justified and documented.
The key is evaluating each data processing activity individually. Some activities legitimately require consent. Others don’t. Using the wrong basis creates compliance risk regardless of which direction the error goes.
Treating consent as a one-time event
Consent needs to be informed, specific, and granular. A blanket “I agree to everything” checkbox doesn’t meet GDPR standards. Individuals need to understand what they’re agreeing to and be able to change their minds at any point. Notifications must be kept up to date so individuals know about current data processing operations as things change over time.
Effective consent management means:
Enabling individuals to consent or decline some or all purposes
Making it clear what each consent choice covers
Providing easy ways to review and update choices (including withdrawal)
Keeping records of when and how consent was given, and specifically to what
Respecting consent choices across all systems (and obtaining new consent as required)
Ignoring GDPR advertising requirements
Paid campaigns aren’t exempt from GDPR rules. If personal data is used to target ads, including through retargeting or lookalike audiences, the same GDPR advertising requirements apply. Platform-level consent tools help, but they don’t replace organizational compliance obligations.
Neglecting data minimization
Collecting more data than necessary isn’t just wasteful — it’s a GDPR violation. Marketing teams should only collect personal data that directly serves a stated purpose. If you can’t identify a reason for a piece of data to exist in your systems (and the legal basis for it), it probably shouldn’t be there.
Data minimization means regularly reviewing what you collect, removing fields that don’t serve current purposes, resisting the urge to gather information “just in case,” setting retention limits based on actual need, and deleting anything that’s no longer necessary.
What happens if you don’t comply with the GDPR?
For marketing teams, handling personal data isn’t just part of the job — it’s central to many campaigns and to marketing performance. Failing to comply with the GDPR carries serious financial, operational, and reputational consequences.
Noncompliance is costly. The GDPR allows fines of up to four percent of annual global turnover or EUR 20 million, whichever is higher. These penalties aren’t always one-off hits. Repeated violations can trigger escalating enforcement action. Additionally, the GDPR allows for a private right of action, so companies may also face lawsuits for violations.
Beyond financial impact, noncompliance damages brand reputation, eroding trust with customers, driving business to competitors, and making potential partners look elsewhere.
EU regulators also have the power to restrict data processing activities or require deletion of existing data. This can directly disrupt marketing campaigns, targeting, and analytics.

Examples of companies that have violated GDPR compliance
Since the GDPR came into force in 2018, more than 4,600 recorded fines have been levied for various types and severities of noncompliance. Huge fines for big tech companies get headlines, but there is plenty of “shadow enforcement” for smaller companies, and the penalties for noncompliance can hit smaller businesses much harder.
Here are some examples of smaller businesses that have incurred GDPR fines.
| Company | Fine amount | GDPR offense | Description |
|---|---|---|---|
| Tuckers Solicitors | EUR 115,000 | Insufficient technical and organizational measures to ensure information security. | Following a ransomware attack on Tucker Solicitors’ systems, which was possible due to flaws in their digital security system, 972,191 files containing personal and special category data were compromised and released in underground marketplaces. |
| Vinted | EUR 2,385,276 | Insufficient fulfillment of data subjects’ rights. | The Lithuanian State Data Protection Inspectorate fined this online secondhand clothing exchange platform for failing to honor users’ data access and erasure requests. |
| ChatWith.io | EUR 12,000 | Noncompliance with general data processing principles. | Users were served data privacy notices when using the ChatWith.io platform, but regardless of whether they consented or denied consent to the collection of their data, the platform gathered, processed and stored their information. |
Learn more about the biggest GDPR fines of the past 5 years.
How Usercentrics supports marketing teams seeking GDPR compliance
The GDPR shapes how marketing teams collect, use, and activate personal data. For many organizations, it has shifted compliance from a legal checkbox to a practical part of building transparent, long-term customer relationships.
That starts with knowing which legal basis applies to each marketing activity and making consent easy to give, review, and withdraw. It also means aligning teams, tools, and processes so user choices are respected consistently across channels.
The companies that do this well aren’t looking for shortcuts. They recognize that privacy by design supports consent-based relationships, leading to more reliable data and stronger trust over time.
Usercentrics is designed to support this way of working. We help marketing teams manage consent across websites, apps, and connected marketing tools, providing a clear view of who has consented to what, and under which legal basis.
By integrating consent signals directly into marketing workflows, it reduces uncertainty around data use and helps ensure campaigns align with GDPR requirements as companies grow.
When consent is handled transparently and consistently, teams’ reliance on data becomes more meaningful, and trust becomes part of the value exchange rather than an afterthought.
In chapter one of this guide, we introduced you to the “visibility up, clicks down” pattern, and how discovery now starts in AI-generated answers.
For a long time, organic growth was just SEO: ranking, earning a click, and conversion on your site. That model still matters, but mostly at the bottom of the journey, when buyers are ready to act.
Things have changed. This is why we treat organic growth as one system with two interconnected components:
- Generative Engine Optimization (GEO) earns inclusion in the answers and third-party sources that shape buyer decisions before the click
- Search Engine Optimization (SEO) captures demand when buyers are ready to click and take action
Both are fed by the same fundamentals: clarity, structure, and trust.
But to create an organic growth system that protects traffic, pipeline, and revenue, you need to understand what AI engines actually do when a buyer asks a question.
In this chapter, I’ll break down:
Why ranking alone is no longer enough to guarantee visibility
How AI evaluates brands and content
How discovery and evaluation fan out across multiple channels
What a modern SEO and GEO system must include to keep your brand visible
Practical tips for implementing your own organic growth strategy
At a glance
- SEO and GEO now form one AI-first organic growth system. Visibility begins in AI-generated answers and converts through high-intent search; both must work together to protect your pipeline.
- Rankings no longer equal visibility. AI answer engines prioritize completeness, credibility, and cross-source validation over traditional position-one rankings.
- Query fan-out defines AI evaluation. To be cited, brands must cover functional, comparative, contextual, implementation, and economic decision facets.
- Extractable, answer-first content increases AI inclusion. Modular structure, question-led headings, schema, and clear claims improve citation likelihood.
- Entity clarity, technical legibility, and off-site validation drive trust. Consistent branding, crawlability, structured data, reviews, and comparison mentions shape AI recommendations.
- Reverse-engineer organic growth from revenue outcomes. Track decision-stage prompts, map visibility gaps, and align SEO and GEO to measurable pipeline impact.
Why you need to reverse-engineer to your desired organic growth outcomes
You don’t “do SEO” and “do AI search” as separate workstreams. You must design one organic growth system that starts from the outcome you care about and work backward.
Reverse-engineering from business outcomes has always been central to how we work at Skale. We start with the deepest measurable goal available: typically qualified trials, SQLs, or pipeline. Only then do we decide which levers to pull across SEO and GEO, brand, distribution, digital PR, conversion rate optimization (CRO), and AI visibility.
If your goal is to increase enterprise demos, you don’t begin with “What should we publish next?” You begin with revenue conversations: What comparisons come up in sales calls, what objections slow procurement, what buyers ask in ChatGPT, and what narratives dominate review platforms, LinkedIn, YouTube, and online communities.
At a high level, the planning process looks like this:
Define the north-star outcome
Pick the commercial metric you actually want to move, like SQLs, pipeline, or revenue. This gives the organic program a clear job to do.
Map the evaluation journey
What buyers need to understand, compare, and validate before they convert. Fan-out makes this practical. (More on this later.)
Identify where trust must exist
Both on site and across the sources buyers and AI systems rely on during evaluation, like review platforms and comparison articles.
Plan the compounding inputs
Positioning clarity, on-site legibility, evaluation-stage coverage, extractable structure, and off-site reinforcement.
In this model, SEO and GEO are fed by the same system. GEO shapes inclusion and preference earlier, when buyers are forming a shortlist. Then SEO captures demand when buyers are ready to click.
Why rankings alone no longer equal visibility
When someone asks a question in ChatGPT, Gemini, or Perplexity, or triggers an AI Overview, the system seeks to assemble a credible answer instead of searching for the top ranking page.
It breaks the prompt into related sub-questions, pulls from multiple sources, synthesizes what it considers to be a complete and credible response, then decides what sources are safe and useful enough to cite.
That’s why you can rank well and still be absent from AI answers.
In practice, when I see ranked pages being ignored, it’s likely a result of these three structural gaps:
Think topical coverage
You might have one good page, but the surrounding content cluster doesn’t exist or is poorly supported. From the model’s perspective, your brand doesn’t “own” the topic. So you might appear once, while competitors with broader coverage appear across multiple sub-queries, including functional, comparative, and implementation-based prompts. (I’ll explain this below.)
Missing comparative or economic context
Your content explains what something is, but not how it compares, what trade-offs exist, or how cost and risk should be evaluated. AI systems need all those layers to construct credible answers. If you don’t provide them, the model fills the gap with someone who does.
Poor extractability
Your answer may be buried, implied, or wrapped in marketing language. AI systems prefer clear, direct explanations they can reuse cleanly. If your key points take five paragraphs to uncover, it’s hard to reuse and less likely to be cited.
Rankings still matter, because Google is still where a lot of high-intent demand gets captured.
We saw this firsthand with Usercentrics. Amidst a shift to a zero-click search engine results page (SERP), clicks have clearly shifted to bottom-of-funnel (BOFU) pages where evaluator behavior was taking place. (And, importantly, we can prove that AI traffic is driving users to these high-intent pages.)
In summary: AI answers and the third-party sources they reuse shape what feels credible and safe before a click ever happens. Rankings no longer guarantee you’ll show up in these spaces where buyers now form their shortlist.
That means your organic growth strategy must now expand beyond thinking in keywords and relevance at the page level. You must also cultivate a presence across the spectrum of prompts and AI results that drive users through evaluation stages.
How AI evaluates brands and content
As you now know, AI platforms focus on question-level intent and ask, “What does a complete, credible answer require?”
To do this, large language models (LLMs) expand a single query into multiple sub-questions. This is called query fan-out.
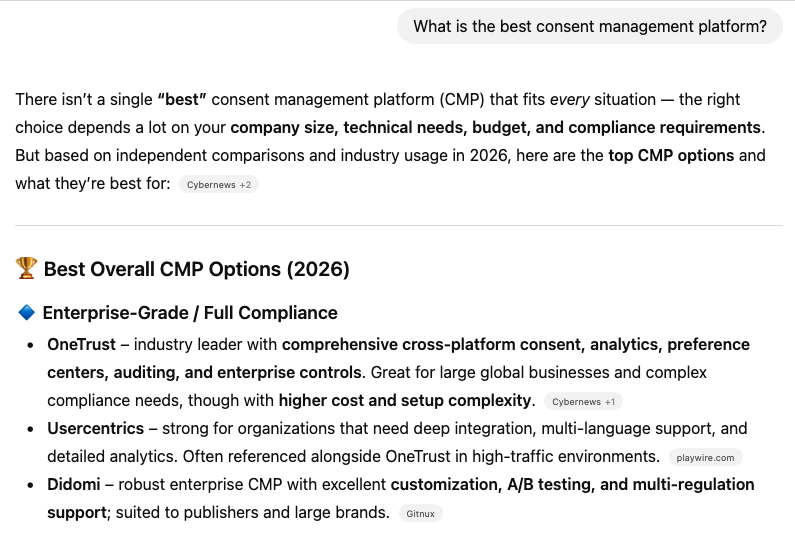
For example, when someone asks: “What’s the best consent management platform (CMP) for a SaaS business?” the system implicitly needs to answer:

What a CMP does
How different CMPs compare
Which are suitable for SaaS
How hard implementation is
What privacy compliance risks exist
How pricing and scale trade-offs work
Each of those sub-questions requires different types of sources. No single page can credibly answer all of them, and no brand that appears in only one slice will show up in all the answers where they need presence.
For each sub-question, AI tends to prefer content that:
Directly relates to the specific component of the decision (not related or generic content)
Demonstrates topical depth and coherence (sustained, comprehensive coverage of the theme across related pages)
Is easy to extract and reuse (clear claims, scannable structure, obvious takeaways)
Is consistent with how the brand is represented elsewhere (category, use case, product naming)
Is reinforced by third-party consensus (reviews, comparison content, credible editorial coverage)
This is where things like entity clarity, consistent brand positioning, extractable content structure, schema, and off-site validation come into play. Together, they help AI systems decide which explanations are safe to reuse when assembling an answer.
The key point is this: AI doesn’t pick the “best page.” It picks the best-supported answer.
We’ll unpack what “best-supported” looks like across the rest of this chapter, and go deeper on content execution and authority reinforcement in subsequent chapters.
Query fan-out explained and the model behind AI answer engines
You now know that AI systems use query fan-outs and draw from multiple sources to build a clear and credible answer.
Across SaaS and tech buying journeys, fan-outs usually cluster around five evaluation facets that cover the full decision journey (rather than focusing on one single prompt or segment).
To be cited — and ideally recommended — by AI systems, you must cover all five.
1. Functional
The functional facet answers the most basic question: Does this product actually solve the problem? For a consent management platform, that might mean explaining what a CMP does, consent collection, preference management, or privacy compliance basics.
Traditional SEO rewards strong product and educational pages. AI systems reward the same thing, but are stricter about clarity and tend to ignore vague positioning and marketing-heavy copy.
They look for explicit mentions of capabilities, defined use cases, and answer-first explanations that they can confidently extract and reuse.
2. Comparative
The comparative facet is where you provide context that enables AI systems to assess how your brand compares to alternatives.
For a CMP, that shows up as queries like “Usercentrics vs OneTrust,” “Didomi alternatives,” “best CMP” lists, and pros and cons breakdowns.
You can win SEO here with strong, editorially sound alternatives, and “best X” pages. LLMs often assemble comparisons from third-party listicles, reviews, and editorial summaries. If you’re absent there, you can be excluded even if your own pages rank.
3. Contextual
Content in the contextual facet helps users answer: Is this right for my situation? AI systems filter out generic positioning and look for specifics that match user needs.
Using Usercentrics as an example, content here could answer whether a CMP is a good fit for a SaaS vs e-commerce brand, outline EU vs UK vs U.S. CMP requirements, or explain enterprise vs SMB needs.
SEO success calls for unbiased “best for X” and segment pages. AI systems want this same context, but won’t trust a single source; they pull this nuance from multiple sources and cross-check them for coherence.
4. Implementation
Users and AI systems want detail around what it takes to roll out your product. Your content should outline the effort involved in setup. Be honest about common complaints or trade-offs, such as tool complexity, as well as expected time-to-value.
SEO treats implementation as a late-stage consideration. AI systems scrutinize implementation upfront when shortlisting tools, and may exclude options that they perceive as having rollout risk, like effort, complexity, or the chance of slow or failed implementation. Brands that avoid detail often lose trust here and don’t make it to shortlisting.
5. Economic
Finally, you need content that outlines costs and any trade-offs. Clarify your pricing approach, costs to scale the tool, and ROI expectations.
In traditional SEO, these details are often limited to pricing pages. AI systems foreground costing.
That’s because users want to sanity check costs and any downsides before they invest time evaluating tools. LLMs look for clear, defensible trade-offs (like how pricing scales and cost vs compliance risk) over vague “best value” claims.
What this means for businesses
Your organic growth strategy should cover all five evaluation facets. This applies to content both on and off of your site, and across all the questions your buyers have and that AI tools need answered in order to recommend you.
Remember, if your competitors cover the missing facets better than you do, AI will stitch them into the response, even if your product is objectively stronger.
6 key components of a winning organic growth playbook
Organic growth requires a coordinated system, which is why no single component wins on its own. AI visibility emerges when these elements reinforce each other across Google, AI-driven discovery, and the full buyer journey.
Here are the six key parts of an organic growth playbook that drives AI visibility and, in turn, pipeline.
1. Consistent branding
Keeping your brand and positioning aligned across all your web properties has always been a challenge for businesses.
Between product changes and messaging shifts, resources aren’t always available to keep content up to date. These inconsistencies already confused Google and other search engines, and AI search has raised the stakes.
AI systems generate answers and summaries based on coherence across multiple data sources. This goes for both owned content and third-party sources.
Pages on your own site with old product naming, legacy positioning, and stale use cases create the same category drift and confusion as outdated information on a review site or online forum.
When that happens, AI systems may:
- Exclude your business entirely
- Hallucinate incorrect information to users
This can directly reduce your share of AI voice, meaning you end up losing out to competitors that AI systems see as better defined and more trustworthy.
Even the best managed brands have inconsistencies. A few I commonly see are:
Vague naming conventions
Unaligned visual branding
Incomplete or conflicting product messaging
Inaccurate or inconsistent listings
Lack of alignment across channels
How to achieve entity clarity
Before AI systems can recommend you, they need a clean, consistent understanding of who you are, what you do, and who you serve.
Follow these seven steps to help improve entity clarity.
Audit brand and product messaging
Review the places that AI systems commonly pull from, like your homepage, product pages, pricing, help docs, blog, social bios, video descriptions, listings, directories, and review sites.
Create a canonical brand description and product narrative
Define a brief company description, ideal customer profile (ICP) and use cases, key claims, approved proof points, and exact product and feature names, then align every relevant page to that source of truth.
Optimize About and author bio pages
Clearly state who you are, what you do, and why you’re credible. Summarize your mission, expertise, and track record, and ensure team bios reinforce authority by listing relevant experience and achievements.
Use structured data to reduce ambiguity
Add schema where it improves interpretation. Common starting points include Organization, Product or SoftwareApplication, Person, Article, FAQPage, and breadcrumbs.
Standardize listings everywhere
Keep your name, category, description, locations, hours, and links consistent across major platforms.
Build and manage reviews
Encourage reviews, then respond consistently in your brand voice.
Extend your web footprint strategically
Focus on a few channels where buyers actually research, and show up with consistent positioning, clear descriptions, and verifiable proof points from trusted sources.
We’ll return to how this plays out across off-site sources and category consensus in a future chapter. For now, the key point is simple: If your brand can’t be categorized cleanly, the rest of the system has nothing reliable to build on.
2. Technical legibility and crawlability
Technical readiness is essential for visibility. If crawlers and AI agents can’t reliably fetch your pages, or understand their structure, even strong content will be ignored by Google and AI systems alike. On-site legibility usually comes down to four areas:
Crawl access and indexability
Machine-readable context (schema and metadata)
Structural clarity and hierarchy
Trust and attribution signals [Experience, Expertise, Authoritativeness, and Trustworthiness (E-E-A-T)]
Crawl access and indexability
Before anything else, AI and search systems need to be able to reach your content.
That means key pages:
Return a clean 200 status code, without redirect chains, broken URLs, etc.
Aren’t blocked by robots.txt rules or noindex tags
Use canonical tags that point to the preferred version of the page
Render important content in the crawler-visible version of the page, not behind scripts, tabs, or interactions that machines may not execute
Allow the AI crawlers you want included, like GPTBot, Google-Extended, and PerplexityBot
Don’t sit behind login walls or bot protection rules that block legitimate crawlers
For most teams, once you’ve set this up, you won’t need to do this again unless your site architecture changes.
Machine-readable context (schema and metadata)
The next step is adding schema and metadata so AI systems can interpret what a page represents.
Schema is structured code that defines what a page is and how the entities on it connect. For example, schema can state that a page is an article written by Jane Doe (person), who works for Company X (organization), and that it was published on Date Y.
Metadata is the descriptive information attached to a page that helps systems understand how to frame and present it. This typically includes the meta title and meta description, which signal the page’s topic, intent, and positioning in search results.
This is especially important for AI visibility because, unlike Google, LLMs use these elements to decide if they will actually read the page contents. They should make it easy for AI systems to figure out:
What is this page?
Who wrote it?
What entity is it about (a company, product, concept, or person)?
What type of content does it contain?
In practice, adding schema and metadata usually involves:
Article schema on long-form content
FAQ Page schema where visible Q&As already exist
Author or person schema tied to real experts
Accurate, descriptive meta titles and descriptions that reflect the page’s intent
This work can typically be completed in a focused sprint.
Structural clarity and hierarchy
AI systems don’t read websites the way humans do. So the next step is to focus on making the structure of your content easy for machines to read.
Pages that perform typically have:
A clear H1 tag that states exactly what the page is about
Logical H2 and H3 tagged sections that each address a single idea
Consistent templates across similar page types (guides, product pages, comparisons, etc.)
A strong internal linking structure that reinforces topical authority and helps Google and AI systems to understand your site’s focus
I want to touch on internal links for a second. In addition to mapping relationships between pages, internal links help systems discover and index pages. Internal links are crucial for both SEO and GEO.
When it comes to internal linking, focus on three things:
Prioritize contextual links over “menu links”
Links placed within the body copy carry more meaning. They show topical relevance and help connect concepts across pages.
Pillar and cluster linking
Link supporting pages to and from a central pillar page so the topic hierarchy is explicit and the main guide is clearly established as the hub.
Clear anchor text
Use descriptive anchor text that makes the destination and relationship unmistakable.
Finally, don’t let pages become orphaned. Every important page should have at least a few internal links pointing to it so search and AI engines can reliably find, crawl, and reference it.
Trust and attribution signals (E-E-A-T)
Finally, AI systems look for signals that content is written by someone credible, attributable to a real person or organization, and consistent with what’s published elsewhere.
On site, that means:
Clear author bylines on relevant content
Detailed author bios that explain why the author is qualified to write on the topic
Links to credible profiles or proof of experience (e.g. LinkedIn, publications, speaking engagements, and certifications)
Consistent naming of products, features, and categories across the site
E-E-A-T matters even more in regulated or high-trust categories like data privacy, where Usercentrics operates. Strong credibility signals often determine whether AI systems include your content in summaries and recommendations or ignore it.
The key point is this: technical SEO is still just as important in the AI search era. Once your technical foundations are in place, they support everything else:
- Content becomes easier to extract and cite
- Content clusters perform more consistently
- Off-site reinforcement has more impact
- Both SEO and AI visibility stabilize
We’ll include an AI readiness checklist and sequencing guidance in an upcoming chapter to help your team execute each step without turning this into a sprawling technical program.
3. Coverage across evaluation journeys
AI systems don’t reward depth in one narrow slice of the customer journey. They favor brands that consistently show up wherever buyers are, from when they’re seeking information on how to solve a problem to when they’re ready to evaluate solutions.
Many marketing teams publish content without an overarching strategy — a guide here, a blog post there, and maybe a comparison page if sales asks for it.
Individually, these pages might be solid, helpful, and relevant to your ICP. But systemically, the coverage is incomplete, disjointed, and fails to convey authority on a given topic.
In a resilient SEO and GEO system, coverage is planned against your customer’s evaluation journey, not against isolated prompts, or even disjointed topic clusters. In other words, topical coverage centers on intent completeness.
As I mentioned above when explaining query fan-out, this means ensuring your ecosystem includes functional, comparative, contextual, implementation, and economic content.
Not every piece of content has to live on your blog. Some of this information is more appropriate on product and pricing pages, in guides, or even off-site in content published by third parties.
What matters is that, taken together, the system leaves fewer unanswered questions for the buyer, and fewer gaps for AI to fill with someone else.
What this looks like in practice
For most teams, improving coverage across evaluation journeys doesn’t mean you have to publish dozens of new pages.
More often, this involves:
Identifying which evaluation facets are underrepresented
Expanding or refreshing existing content to close those gaps
Determining where coverage from third-party sites is needed
Connecting content across your site through internal linking
Prioritizing late-journey and high-risk questions that cause buyers to hesitate
4. Extractable content structure
After you’ve planned out your full-funnel content strategy, work on content extractability. Let me explain what I mean here.
Answer engines scan for self-contained units of meaning, i.e., sections that clearly answer a question or resolve a decision point on their own.
If answers are buried in long paragraphs, inconsistent sections, or narrative-heavy formats, they struggle to translate this information cleanly into answers.
We refer to this as modular, extraction-ready content.
How do you design content that AI can extract?
Extractable structure requires you to focus on creating content that’s clear, helpful, and easy to understand. Here are a few tips:
Add a short TL;DR section or key takeaways
Include a quick summary near the top, and add a concise bullet list or tables to clarify your point.
Modular structure
Break pages into clear, self-contained blocks that are usually around 150–300 words. Each is focused on a single idea. A reader (or AI system) should be able to land on a section and understand it without needing to read the entire page.
Use question-led headings
Write H2 and H3 tags that reflect real buyer queries, with a clear hierarchy that makes the page easy to scan.
Answer-first sections
Start these sections with a direct response to the question. Don’t warm up for three paragraphs. State the point early, then earn the reader’s attention with detail and examples.
The section you have just read is a good example of a modular content structure. Here is another example we used for Usercentrics.
Good content structure has always been an essential SEO tactic because it improves readability, engagement, and featured snippet eligibility.
And AI visibility and snippets aside, extractable content is easier for humans to read and digest on a screen (especially on mobile) so it’s a win-win.
We’ll go much deeper on how to design content this way, including examples and patterns, in an upcoming chapter. For now, remember that if AI systems can’t extract your thinking cleanly, they won’t use it, no matter how strong the underlying insight is.
5. Off-site trust signals
AI systems rely on off-site signals from third-party sources to cross-check your claims and validate accuracy, relevance, and consensus.
Google has always done this to some degree, which is why link building is a pillar of a successful SEO strategy.
What’s changed is how directly off-site signals influence AI answers; off-site trust is now about where you appear and how you’re described, not just how many links point at your domain.
In traditional SEO, the value of a link placement is often judged by metrics like domain rating (DR) or referral traffic.
In modern GEO, a mention on a highly cited comparison page can matter more than a high-DR link, and being present inside the sources AI already reuses outweighs raw link equity.
AI engines favor brands that appear consistently across trusted, category-relevant sources, including:
Review and comparison platforms where customers validate use cases, weigh pros and cons, and share lived experience with your product
Editorial listicles and category roundups that contextualize the market and provide a shortlist of options
Contextual brand mentions in relevant guides and discussions that explain why a product is used
What’s more, off-site GEO work is less about chasing individual placements and more about reinforcing a coherent narrative across the web.
AI platforms assess every source your brand is mentioned in to form an opinion about it. So you need to be sure that third-party sources talk about your brand the way your brand talks about itself. Messaging consistency across sources plays a huge role in how accurately LLMs characterize you, and if they will mention you at all.
When your brand positioning and owned content are strong, third-party reinforcement acts like a multiplier that helps increase visibility in AI answers and drive better-qualified traffic when buyers are ready to click.
6. AI prompt tracking
Alongside your strategy development, you’ll work on prompt selection and tracking. It enables you to monitor how your brand shows up in the AI searches your ICP makes.
We use our internal AI monitoring tools to track AI visibility across platforms like ChatGPT, Perplexity, Google Gemini, and Microsoft Copilot.
My first tip: Don’t approach AI prompt tracking like traditional keyword tracking.
The goal isn’t to mirror branded search demand or inflate coverage with endless variations. And in most cases, we avoid tracking purely branded prompts unless they reflect genuine comparison or evaluation behavior where decision intent is clearly present, like in a “brand vs competitor” prompt.
Instead, we build a tightly curated, decision-relevant prompt set grounded in ICP behavior and real buying context.
At Skale, we track well-distributed prompts that cover discovery, capability validation, comparison, and risk-proofing stages. These prompts should be balanced across decision depth:
25–30% should focus on discovery
25–30% should focus on capability validation
20–30% should focus on active comparison
The remainder should address risk-proofing to ensure no single stage dominates the set of prompts you track
This ensures you’re measuring AI influence across the full buying journey, not just replicating SEO logic inside an LLM environment. And every prompt should pass a quality check. Ask yourself:
- Which persona would ask this?
- Which use case does it represent?
- Which decision moment does it map to?
If you can’t clearly answer those three questions, the prompt doesn’t make the cut.
When you track the right prompts, you’ll get reliable, actionable AI visibility insights that can be trusted over time.
Of course, you need to track AI prompts along with SEO performance, like rankings and clicks, for a holistic view of your organic growth performance.
But don’t stop there: be sure to tie these metrics to the indicators that really matter for your brand, like SQLs and pipeline growth. (More on that in an upcoming chapter of this guide.)

How to incorporate GEO into your organic growth strategy: getting started and continuous monitoring
Where should you begin when developing an organic growth strategy? A brand audit and query fan-out are good starting points. Then, you need to run ongoing checks and audits. Here are my tips for each stage of the process.
Get started with initial evaluation
You have to evaluate where your brand stands in terms of visibility, both on AI platforms and beyond.
A holistic brand audit helps with this. Here, you’ll evaluate your current brand coverage and share of voice.
Brand coverage measures how comprehensively your brand appears across your category’s decision moments. Look beyond search rankings to evaluate coverage in AI answers, comparison pages, communities, review platforms, and “best X for Y” queries.
This enables you to determine whether your brand consistently shows up as a credible choice when buyers explore, compare, or validate options.
And remember, third-party content, review platforms, online communities, and social media all contribute to how you perform in AI searches, which is part of the reason I recommend evaluating them in your brand audit.
How to evaluate brand coverage
Set up monitoring in your AI tool for relevant prompts, Google results for relevant keywords, review platforms, and social.
Evaluate how much coverage you receive and what kind (positive vs. negative sentiment, source authority, topical relevance, etc.)
Determine where your brand shows up the strongest and where it’s lacking visibility.
Share of voice, by contrast, measures your exposure relative to competitors within a defined channel, be it AI mentions, paid ads, or keyword rankings.
You can dominate paid search or rank well organically and still be missing from AI summaries, vendor comparisons, or peer discussions. And if you aren’t included in those recommendation layers, you’re letting competitors fill that space.
How to evaluate share of voice
Define which competitors you’ll track against (approx. 2–3 hours of work)
Measure your mentions vs. competitor mentions in the same environment you monitor for brand coverage (approx. 2–3 hours of work)
Divide your brand’s mentions by total mentions across your competitive set (approx. 2 hours of work)
Brand coverage and share of voice both measure your general visibility across various channels. Now it’s time to strategize how you will secure visibility across the full decision journey using query fan-out.
How to map fan out for a topic
Start with one commercially meaningful buyer question, the kind that shows real evaluation intent, not a generic prompt. For a CMP category, that might be “best consent management platform for SaaS,” or “CMP pricing and implementation.”
Next, map how AI expands that single question into the five recurring evaluation criteria we discussed above: functional, comparative, contextual, implementation, and economic.
Then validate your map against observed AI behavior (not assumptions). Run the same decision query across distinct LLMs, like ChatGPT, Gemini, and Perplexity, and capture:
Which evaluation facets dominate in AI results
Which sources are repeatedly cited
Which competitors show up (and where)
Whether your brand appears consistently across evaluation facets or only in one slice
If you want to speed this up or monitor it over time, many AI monitoring tools support fan-out testing. But manual cross-platform checks are still the most reliable way to see what models are actually doing in your category.
Next, do a fast gap check using your SEO toolset and site data.
Use Ahrefs to keep your query shortlist grounded in commercial relevance. Screaming Frog and GSC/GA4 can show you whether you actually cover all the key facets and that the relevant pages are connected through careful internal linking.
Finally, analyze your owned and earned sources:
Which facets are credibly answered on-site in a way that’s easy to reuse?
Which facets are answered off-site (reviews, listicles, comparisons you’re absent from)?
Where does AI default to competitors because your coverage is thin, disconnected, or hard to extract?
This is front-loaded work with a light maintenance cadence. Start with a full fan-out mapping round (around 20 priority queries, with deeper maps for your top five).
Then, revisit it quarterly, or sooner, if AI referrals shift materially, your positioning changes, or competitors start showing up in facets where you’ve been absent.
Defend your position with ongoing checks and auditing tasks
Your AI visibility shifts as platforms evolve, competitors publish new content, and query patterns change. That’s why you need to run regular, ongoing checks to maintain AI visibility.
Here’s what to do:
Start with a quarterly AI visibility review.
Select your top 15–20 commercial queries and test them across ChatGPT, Gemini, and Perplexity. Document whether you’re cited, which competitors appear, and what types of pages are referenced. The point is to test a consistent sample so you can spot patterns and changes over time.
Review query fan-out coverage for priority topics
For your top clusters, map whether you adequately cover the five core facets: functional, comparative, contextual, implementation, and economic. If competitors are cited for facets you don’t address, that’s a clear content gap.
Run a technical audit twice per year
Confirm AI crawlers are allowed, key pages return clean 200 status codes, schema is valid, and internal linking is strong.
Monitor entity consistency and brand mentions monthly
Finally, track how your brand is described across review sites, directories, and cited pages. Watch for category drift, inconsistent product naming, or competitor share of voice gains.
Ideally, this process should become a structured 90-day loop: test, diagnose gaps, implement improvements, then retest.
Visibility is a long-term investment, not a one-time hack
If this chapter leaves you with one takeaway, let it be this: SEO and GEO aren’t separate. They are inputs into the same growth system.
Organic growth is less about doing one big thing and more about doing the right small things consistently. This compounds over time and protects your traffic in an era when search doesn’t behave the way it used to.
In a modern organic growth playbook, the goal is to earn a place on the shortlist before a buyer ever lands on your site. That only happens when your brand is easy to categorize, your content is easy to pull answers from, and other credible sources reinforce your claims.
It also means you show up with clear, defensible detail when buyers look for practical information about how your product works, what it costs, and which problems it addresses.
Next up, we’ll focus on the lever you control the most directly: content. In upcoming chapters we will explain how to structure content so it’s easy to extract, genuinely useful during evaluation, and more likely to turn visibility into a qualified pipeline.
Increasingly strict default browser privacy settings, cookie deprecation, and the widespread use of ad blockers have eroded the reliability of traditional attribution methods. This means marketers are seeing more dropped events, lower match rates, and inconsistent reporting across platforms.

Server-side tracking (SST) attribution offers a privacy-safe alternative to the client-side equivalent. When implemented effectively, this technique will help restore your confidence in both your data quality and measurement.
By routing consented event data through your own infrastructure instead of the user’s browser, server-side tracking enables you to see what’s working while maintaining compliance with evolving data privacy laws.
At a glance
- Client-side attribution is increasingly unreliable due to blocked cookies, scripts, and browser privacy controls.
- Server-side tracking attribution shifts data collection off the browser and onto infrastructure you control, improving conversion crediting.
- Events are first processed server-side, where they can be validated, deduplicated, consent-filtered, enriched, and then forwarded to tools like GA4, Meta CAPI, and Google Ads.
- Routing events through the server reduces signal loss and improves match rates, supporting more accurate cross-session and cross-channel attribution.
- When implemented correctly, server-side tracking improves measurement performance while strengthening privacy compliance and consent enforcement.
What is server-side tracking attribution?
Server‑side tracking attribution is the process of assigning user actions to marketing channels by collecting and processing data on a server you control.
With traditional client‑side tracking, pixels or scripts are embedded on your website or mobile app and run in a user’s browser. Those scripts send data about visitor interactions directly to third-party platforms like Google Analytics 4 (GA4), Meta, or other ad networks.
Many marketers currently rely on client-side pixel events to monitor customer activity, but they’re quickly losing value. Popular browsers increasingly block third‑party cookies, ad blockers intercept tracking calls, and privacy settings can drop critical identifiers. These obstacles can create gaps in data and distort how channels are credited for conversions.
Server-side tagging and tracking shift this process from the user’s browser to your own servers, which can dramatically improve the reliability of your attribution data.
Because server-side data is collected in a controlled environment and transmitted securely from server to server, it often bypasses browser restrictions. That means fewer dropped signals and cleaner data paths. Plus, more trustworthy insights into which campaigns and channels are driving real business outcomes.
How SST attribution works
Server-side attribution tracking works by routing user interaction data through your own server for processing, enrichment, anonymization, or filtering before it reaches external analytics or ad platforms. This gives you more control over what data is tracked, how it’s processed, and where it goes.
Here’s a quick breakdown of what the workflow typically looks like when you implement server-side tracking:

Event capture
User actions like page views, product clicks, or purchases are captured on your website or app, just as they would be in a client-side setup.
Data sent to server
Instead of sending this data straight to third parties, it’s sent to your server first.
Data enrichment and privacy filtering
On your server, you can enrich the event data and apply filtering so that you are only forwarding privacy-compliant, relevant data.
Events sent to third-party platforms
Events are dispatched to platforms like GA4, Meta Conversions API (CAPI), or Google Ads for attribution tracking and performance reporting.
Response handling or tracking feedback loop
In some cases, the destination platform returns a response, which you can log and use to optimize your data flow.
Why traditional attribution is broken
For years, marketers have relied on client‑side tracking. They’ve used pixels, JavaScript tags, and third‑party cookies to collect data, stitch together user journeys, and attribute conversions to the right channels.
This model assumes that every interaction will be recorded accurately by a browser and faithfully passed along to analytics and ad platforms.
The problem is that modern browsers are taking steps to protect user privacy and curb cookie and tracker use. For example, Apple’s Safari uses Intelligent Tracking Prevention (ITP) to block and limit tracking cookies and related identifiers by default. Firefox does something similar with its Enhanced Tracking Protection (ETP).
Google Chrome has also shifted its approach to third‑party cookies. Chrome no longer permits unrestricted tracking. Instead, it now leaves the decision to accept or reject third-party cookies up to users, and features enhanced privacy tools.
There are other real‑world limitations to client-side tracking aside from browser restrictions. Ad blockers and privacy extensions can prevent your JavaScript tags and pixels from firing at all.
When scripts fail, third-party platforms never receive those signals. That can lead to gaps, mismatches, and underreported conversions. For instance, you might see a sale in Meta Ads but not in GA4, or vice versa, because each platform is working from its own incomplete slice of client‑side data.
Imagine a user who clicks on your ad from their phone, browses your store on a desktop, and finally buys on their tablet. If a cookie was blocked or deleted in one session, the connection between these touchpoints can disappear.
Working with a fragmented picture instead of accurate attribution across the full customer journey might lead you to credit a particular channel inaccurately and create skewed insights into performance.
These structural limitations are exactly why more and more marketers are turning to server‑side solutions that use first-party data instead of relying on shaky browser behavior or third‑party cookie lifecycles.
How server-side tracking fixes attribution gaps
One of the major benefits of server-side tagging and tracking is that they help marketers improve the accuracy and completeness of their attribution models in a landscape where browser-side signals are increasingly unreliable. We’ve found that implementation can result in up to 46 percent more conversions tracked.
By moving data collection to a controlled server environment, teams can capture, validate, and enrich more events before they’re sent to a third-party. Let’s take a closer look at some of the mechanisms that support this enhanced data accuracy.
Server-Side Tagging: Benefits backed by industry case studies*
Reduced signal loss
In client-side setups, events can go missing due to browser restrictions, network failures, or ad blockers. Server-side tracking captures events and routes them through your own server, making them more reliable.
Even if a user’s browser blocks a script or fails to load a pixel, the backend can still record the interaction and forward it to analytics or ad platforms. This measure reduces signal loss and helps ensure that more conversions are accounted for.
Event validation
Your server has a chance to validate events before they’re sent to external platforms. This step includes checking that parameters are complete, deduplicating repeated events, or applying business logic to filter out noise.
Sending clean, validated events to third-party platforms reduces the chance of platform-side rejections or mismatches. It improves the consistency of your attribution tracking and leads to cleaner reporting across systems.
Consistent user identification across sessions
Server-side tracking enables the use of more durable identifiers alongside or instead of browser cookies, such as login IDs or hashed email addresses. These identifiers help link activity across devices and sessions.
The result is a more complete view of the customer journey and stronger attribution accuracy, especially for performance-focused campaigns.
Match rate improvement
Platforms like Meta Ads and Google Ads have noted that server-side integrations, such as Meta’s CAPI and Google’s Enhanced Conversions, improve match rates between ad interactions and conversion events.
Higher match rates lead to better attribution models and help automated systems like smart bidding optimize more effectively. Server-side tracking makes it easier to meet the technical requirements for these integrations, improving both measurement and performance.
Data enrichment
With SST, you can enhance event data before it’s sent, for example, by appending campaign metadata, Urchin Tracking Module (UTM) parameters, or Customer Relationship Management (CRM) identifiers.
Enriched data improves match quality, supports more granular attribution analysis, and provides platforms with the full context they need to correctly credit conversions. This enrichment process is much more difficult to do securely on the client side.
How to configure server-side tracking for accurate attribution
Accurate attribution requires careful implementation. The steps below outline how to set up server-side tracking for attribution that preserves data integrity, improves platform match rates, and supports consistent measurement across channels.
Step 1: Implement a server-side tagging environment
The first step in configuring server-side tracking is to set up the infrastructure where your tags will run.
First, you’ll need to find a provider. This might involve provisioning a cloud function, e.g., Google Cloud Run, deploying a dedicated tagging server, or using a managed solution like Usercentrics’ server-side tagging.
The server will be the central point for all of your data management tasks, from data collection and processing to routing event data to third-party tracking platforms. That means it’s important that your setup works for your particular business needs.
Step 2: Connect your consent management platform
While SST gives you greater control over the data you collect, you still need consent to track users. This is made easier when you connect your server-side tracking setup to a consent management platform (CMP) like Usercentrics, which automatically applies consent choices to event tracking.
For example, when a user opts in to digital marketing tracking, your server will automatically forward events to Meta CAPI or Google Ads. If they opt out, the server will withhold or anonymize the data, so privacy choices are respected in every attribution request.
Step 3: Configure platform integrations
In order for attribution data to reach your key marketing platforms, you’ll need to configure server-side integrations with tools like Google Ads, Meta (via CAPI), and GA4. This step ensures enriched, consented data is routed correctly to improve match rates and reporting accuracy.
Usercentrics, for example, includes out-of-the-box integrations for GA4 and Meta CAPI, so you can send accurate, consented events directly from your server to third-party platforms without any manual input.
Step 4: Test and validate
Before going live with server-side tracking, you need to verify that your server-side data collection setup works as expected. Check that events are firing correctly, consent rules are being respected, and data is reaching each platform in the proper format.
For example, you might test a purchase event to confirm it’s being received by Meta, complete with hashed email and timestamp. It’s best to use platform-specific debugging tools to catch issues early and make sure attribution data is clean and complete.
Improve ROAS while protecting customer privacy with server-side tracking attribution
Server-side tracking attribution gives marketers a way to reclaim visibility as privacy restrictions increase.
When you capture cleaner, more complete data and control how it’s validated, enriched, and shared, you can improve cross-channel accuracy, close attribution gaps, and make smarter decisions about where to spend. Because of these benefits, SST can help reduce CPA by up to 57 percent.
Tracking user activity server-side also makes it easier to comply with many data privacy regulations, and can help to build user trust. With better privacy controls compared to browser-based tracking, SST enables you to adapt to evolving privacy regulations.
Usercentrics helps marketing and analytics teams unlock the full value of server-side tracking attribution with out-of-the-box integrations for GA4, Google Ads, and Meta, while enforcing real-time consent for simplified multi-regulation privacy compliance.
It’s the best first step toward Privacy-Led Marketing, where accuracy, compliance, and marketing performance work together for increased user trust and improved attribution.
Terms and Conditions (T&Cs) help to protect your online store by setting clear expectations with customers, reducing chargebacks and their impact on your revenue, and lowering your risk of legal disputes.

They also impact how shoppers view your website. Fewer than half of consumers say they trust e-commerce stores, which is fewer than those who trust other types of retailers. Clear, well-drafted terms communicate that your business is legitimate and professional, helping you attract new customers and build trust and repeat purchases with existing ones.
But just using a generic Terms and Conditions template leaves gaps. Running an online store involves unique challenges, like managing large volumes of customer data and fulfilling international orders. You need comprehensive terms tailored to your company’s needs and operations to protect your business.
This article explores why Terms and Conditions for e-commerce matter, and explains what an effective agreement covers with examples of each clause.
At a glance
- Terms and Conditions act as a contract between your e-commerce store and your customers. They set the rules for using your site and purchasing products.
- A clear Terms and Conditions agreement reduces legal risk by defining your obligations and outlining customer responsibilities.
- E-commerce sites should display Terms and Conditions prominently. For example, linked from the website’s footer, during checkout, and at the account creation step.
- Strong Terms and Conditions cover core areas like pricing, liability, shipping, refunds, IP ownership, promotions, user content, and governing law.
- Consumer laws in the EU, UK, and U.S. shape certain requirements for e-commerce Terms and Conditions, so understanding these regulations and incorporating them into your agreement is essential for cross-border sales.
What are the Terms and Conditions for an e-commerce website?
Terms and Conditions (also sometimes referred to as Terms of Service) make up the legal contract between your e-commerce website and your customers. They set rules for how people access and use your platform and purchase products from your online store.
Although they exist alongside other policies, T&Cs serve a distinct purpose. They combine both your terms of sale and your website use policy into a single contract.
Other important policies include:
- Privacy policy: Explains how you collect, process, and store information and your legal bases for doing so
- Cookie policy: Outlines the tracking technologies you use on your site and visitors’ consent options
- Returns and refund policy: Covers the options customers have under consumer laws if products are faulty, arrive late, or are not as described
Together, these policies help you meet data privacy compliance requirements and protect your e-commerce website from unnecessary risks. Your Terms and Conditions agreement can reference each of them, but it shouldn’t replace them.
Why should your store have a Terms and Conditions agreement?
Every online business that sells to customers benefits from having T&Cs, and they are often legally required. For starters, these agreements limit your liability by defining the scope of your service.
The agreement helps clarify where your obligations to customers end, so they know which situations you are and are not responsible for. Clear boundaries like these minimize the risk of complaints or claims being made against your business.
Terms and Conditions also outline your customers’ rights and responsibilities. They set expectations for how to use your online store, which reduces the chance of confusion or misunderstandings. They also give you grounds to take action if someone breaches your agreement.
Finally, T&Cs help signal to visitors that you’re a trustworthy brand because you provide transparency around how your company operates before customers make a purchase. This extra reassurance can attract new customers, especially since 97 percent of people express concerns about shopping on unfamiliar websites.
Where should e-commerce sites display their Terms and Conditions?
Your e-commerce Terms and Conditions or Terms of Service should be easily accessible from anywhere on your website. The footer of each page is a highly visible option. You can also increase visibility by labeling the link clearly and using a legible font size, color, and type.
Additionally, include the link at key moments in customer interactions, such as during checkout or account creation. This gives website visitors a quick way to refer to your policies before they confirm a purchase. That kind of simple accessibility maintains trust and supports the enforceability of your agreement.
What do e-commerce businesses need to include in their Terms and Conditions?
While each business’s terms will be different, in general T&Cs must cover certain core areas to reflect how your e-commerce business operates. Here are some recommendations for sections to include for an agreement that is comprehensive and enforceable.
Be aware that these examples can serve as inspiration, but you should never just copy and paste another site’s Terms and Conditions. Instead, consult legal counsel to build out an agreement that aligns with how your business operates.
General terms of use
General terms of use act as an introductory clause and provide a brief overview of the conditions for using your website and its features. Typically, this section states the need to comply with applicable laws and follow any additional rules you have in place to protect your business.
Many businesses add a policy limiting use of their website to noncommercial purposes. The goal is to prevent customers and competitors from exploiting your website for their own gain. In the following example, the cosmetics brand Aesop has included a list of prohibited activities, such as copying and redistribution, to clarify these rules for visitors.
Intellectual property rights
An intellectual property (IP) or copyright clause clarifies who owns the content on your website and states that visitors aren’t permitted to copy or redistribute it without your permission. This clause protects your brand’s creative work by preventing people from reusing your materials elsewhere.
For an example of what content to include in your intellectual property clause, see this example from Fjällräven. The outdoor clothing and equipment brand’s policy lists different products, brand assets, and website features.
Pricing and payment terms
Your Terms and Conditions should include a clause that explains your pricing structure and how payment processing works at your online store. It should include:
How you display prices
Which taxes and other fees may apply
Accepted currencies
Accepted payment methods
When you charge cards
Renewal information (if you have subscription services)
It’s a good idea to clarify that you retain the right to change prices at any time, as LEGO has done in the example below. This minimizes the risk of customer disputes due to price increases or sales ending before they had a chance to make a purchase.
Exclusion and limitation of liability
A limitation of liability clause states the boundaries of your company’s obligations to customers to the maximum extent permitted by law.
As shown in the example below from Mammut, this clause typically excludes liability for issues caused by customers breaching your terms or by circumstances beyond your control. For example, stores aren’t usually held responsible for delays or issues resulting from:
- Adverse weather conditions or natural disasters
- Strikes, shutdowns, and other disruptive events
- Government-imposed restrictions
- Technical issues with the customer’s device or internet
- Third-party providers
Product information
Include a clause that explains that products may differ slightly from how they appear online. Doing so sets customers’ expectations and avoids disputes over minor differences between product descriptions and images versus the item the customer receives.
For example, paint brand Dulux has included a large product policy in their Terms and Conditions because light, wall texture, and room size can affect how colors appear.

Promotions and sales
Discounts, promotional codes, and limited-time offers create legal obligations your website needs to clarify. Include a section on promotions in your agreement to explain your rules for:
- Eligibility
- Expiration dates
- Usage limits
- Exclusions
- Minimum spend thresholds
If you have different types of promotions, you may need a separate section for each one, like beauty retailer Sephora has done in this example.

Shipping and delivery information
This clause explains how your business fulfills orders, including:
- Shipping costs
- Delivery methods
- Estimated timeframes
- Third-party partners you work with
Covering different scenarios can help customers understand what to expect and reduce your risk of receiving negative reviews. For instance, fashion retailer Zara’s policy explains what happens if a package can’t be delivered. That way, people know what to do if they aren’t home when a delivery attempt is made or if their order is sent to the wrong address.
You may also want to create a separate shipping policy to outline this information. Regardless, it’s a good idea to include at least an overview of the way your shipping and delivery processes work in your T&Cs.
Return and refund information
Depending on where your business and customers are located, consumer laws may require you to accept returns within certain time limits and offer refunds or replacements for faulty products. You must include this information in your site terms to make customers aware of their rights.
A return and refund clause also gives you a chance to clarify your processes. For example, sock company DarnTough uses their policy to explain the conditions for its “Unconditional Lifetime Guarantee,” which enables customers to claim free replacement products at any time.
User-generated content
You may want to include a clause that sets rules about what types of content users can contribute to your website. A user-generated content clause states that you have the right to remove anything that violates your terms or harms other users.
Most e-commerce stores only have to concern themselves with customer reviews, ratings, and questions. For example, furniture and household goods conglomerate IKEA prohibits users from submitting feedback that misrepresents their business or contains hateful language.
Some websites permit users to upload content to create customized products, in which case you need to clarify what’s acceptable and who owns the intellectual property.
Amendment of terms
Terms and Conditions should change as your business practices, relevant regulations, and legal obligations evolve. Include an amendment of terms clause to clarify your right to update your policies, as well as your responsibility to customers for communicating these changes.
Consider displaying the date your agreement was last updated at the top of the page, like outdoor clothing and recreation company Patagonia does. This shows customers which version of your terms they agreed to and which rules applied for a specific purchase, which can help you resolve potential disputes faster.
Jurisdiction and governing law
This clause states which country’s laws apply to the agreement and under which jurisdiction your business handles dispute resolution.
Businesses that operate across borders need to clarify this detail. If an overseas customer understands which consumer laws apply to purchases made on your site, they won’t mistakenly pursue legal action against you for not following the policies in place in their own country.
A governing law clause doesn’t need to be extensive. Even multinational retailers like Bosch only dedicate a few paragraphs to it in their agreement.

Which consumer laws govern e-commerce Terms and Conditions requirements?
Although you have some flexibility about what to include in T&Cs, you’re often bound by consumer laws. These determine your responsibilities to customers and how you must shape the clauses of your agreement.
Here are three main consumer laws to be aware of:
| Regulation | Jurisdiction | What it impacts | Overview |
| Consumer Rights Directive | EU | Returns and refunds | EU residents are entitled to certain protections, including upfront information about products and payments and the right to withdraw from purchases. Member States must uphold these rights and enforce laws, but they’re free to set their own penalties, as long as they’re “effective, proportionate and dissuasive.” |
| Consumer Rights Act 2015 | UK | Repairs and exchanges | Companies are legally required to facilitate repairs and replacements within a reasonable timeframe and at their expense. However, customers can’t insist on this option if the costs are disproportionate to the price of the original purchase. |
| Mail, Internet, or Telephone Order Merchandise Rule (MITOR) | U.S. | Shipping and delivery | This law states that you must only give realistic timeframes for shipping and delivery. If you don’t provide a time frame, the default is 30 days. |
Protect your business and build trust with customers
Clear, well-written Terms and Conditions help you run your business with confidence by minimizing your risk of disputes with customers. They’re essential for online stores that deal with cross-border sales, regulatory oversight, and constant web traffic.
But T&Cs are just one part of a broader legal and data privacy compliance strategy.
Usercentrics, for example, helps you comply with key privacy laws like the General Data Protection Regulation (GDPR) and the California Consumer Privacy Act (CCPA). As regulations change, the platform automatically updates your privacy notice, cookie banner settings, and other disclosures about your data practices.
Keeping all of your documentation accurate and up to date, from Terms and Conditions to data processing policies, helps you prevent disputes, avoid penalties for noncompliance, and keep your business running smoothly.

Companies need insight into how marketing strategies perform, but they don’t always have a clear path to get it. Teams struggle to make sense of data scattered across multiple channels and platforms, and privacy-driven data loss and reduced identifiers only contribute to the growing visibility gap.
As a result, over half of marketing teams admit they don’t have a clear view of the customer journey. They can’t reliably see how different touchpoints connect, which means they can’t accurately attribute outcomes across different channels.
The shift toward complex, multi-device customer journeys exposes the limitations of traditional attribution. Models designed for simple, linear journeys no longer reflect the realities of modern marketing strategies. Businesses need to implement cross-channel attribution if they want to get actionable insights into what works and where they should focus their marketing spend.
This article covers cross-channel attribution, why it should be a priority, and how it works. It also unpacks common challenges that marketing teams face and how to overcome them while putting data privacy first.
At a glance
- Traditional, linear attribution models break down in modern marketing because journeys are complex, multi-device, and fragmented across touchpoints.
- Cross-channel attribution stitches online and offline touchpoints into one journey, so you can see how channels work together to influence conversion outcomes.
- The core mechanics of cross-channel attribution are simple: track interactions over time, accept non-linear behaviour, then distribute credit across touchpoints.
- Increased privacy protections like cookie blocking, browser restrictions, and stricter laws are widening attribution blind spots, which makes ROAS harder to prove and budgets easier to misallocate.
- Implementing a privacy-first attribution framework built on consented data, server-side tagging, and consistent enforcement makes cross-channel measurement reliable and scalable long term.
What is cross-channel attribution? What marketers need to know
Cross-channel attribution measures how different marketing channels contribute to marketing goals, both on- and offline. It reflects how people engage with brands and what leads them from initial awareness to conversion.
Cross-channel attribution is often built on multi-touch attribution (MTA), which assigns value to various interactions in the customer journey.
For example, someone might see a paid ad on social media, search for the brand later, and sign up for email updates. After receiving a promotional message with a discount, they may browse the online store, then end up visiting a physical shop to complete their purchase.
Cross-channel attribution aims to connect all of these interactions into a single journey rather than looking at specific touchpoints in isolation.
While cross-channel marketing attribution involves tools, it’s not a software or reporting feature. It’s a data architecture challenge shaped by your data practices.
You can use cross-channel attribution alongside other strategies. For instance, many businesses use a combination of MTA and marketing mix modeling (MMM). MTA drives real-time spend and strategy decisions, and MMM grounds long-term strategy.
How does cross-channel attribution work?
Cross-channel attribution involves looking at multiple signals to understand how your customers’ journeys unfold. Here are the basic steps:

Track the entire customer journey
This step considers user interactions across various marketing channels, platforms, devices, and environments. Instead of treating each interaction as a separate event, it connects them over time.
Recognize non-linear consumer behavior
Acknowledge that people don’t follow a fixed path on their way from awareness to conversion. Cross-channel attribution accounts for them repeating, skipping, or overlapping steps in the process.
Assign value to each type of interaction
Never assume that one moment is responsible for outcomes. You’ll need to distribute value across multiple touchpoints to support a more balanced understanding of the typical customer journey.
5 types of attribution models
Once you’ve set up cross-channel attribution, you must assign values to touchpoints. Here are different types of attribution modeling marketing teams commonly use.
First-touch
Assigns the value to the first interaction a customer has with your brand.
Last-touch
Gives the value to the final interaction before conversion.
Linear
Distributes value evenly across all the marketing channels and touchpoints regardless of timing.
Time decay
Assigns more value to touchpoints closer to conversion.
U-shaped
Assigns the greatest value to the first and last touchpoints a customer has with your brand.
Each of these models has value and can provide useful insights depending on your marketing goal.
Why cross-channel attribution matters now
As attribution becomes more complex, businesses can no longer rely on traditional methods. A cross-channel attribution model gives you more complete and reliable customer data to inform your marketing strategies.
Much of this pressure comes from a series of shifts, such as:
Online and offline interactions blending in the customer journey
Data silos due to the lack of a connected tech ecosystem
Stricter data privacy laws leading to extra steps to maintain compliance
New tools like Safari’s Intelligent Tracking Prevention (ITP) and Firefox’s Enhanced Tracking Prevention (ETP) that limit third-party cookies
The increase in the use of ad-blocking technology, leading to cookie deprecation
Application Programming Interface (API) restrictions on how you can share data across platforms
Together, these factors create gaps in visibility and lower match rates across marketing channels. And the challenge is only growing as data privacy laws tighten and users take more control over their personal information.
For example, a recent survey found that one in four people in the US actively block cookies, meaning that up to a quarter of essential data could be missing from your marketing attribution.
As a result, ROAS and marketing ROI optimization becomes more challenging, and budgets are more likely to be misallocated. Marketing teams need cross-channel attribution to overcome these issues and build compliant, privacy-first processes.
Key benefits for marketers to consider
Cross-channel attribution helps you overcome these challenges and leads to more resilient data-driven marketing strategies. It typically introduces the following benefits.
| What? | How? | Real-world example |
| Improves campaign performance | By enabling you to track your marketing efforts across channels, so you can evaluate and adjust spend more accurately | You see that emails increase webinar signups, so you work on refining newsletter messaging and doubling down on drip campaigns. |
| Optimizes marketing spend and increases ROAS | By revealing which touchpoints contribute to conversions and showing you where to invest your budget | Your paid ads don’t generate a high volume of clicks, but they appear early in many conversion journeys, so you keep them running. |
| Enables more cohesive and effective marketing strategies | By creating a more consistent view across multiple marketing channels and touchpoints, so it’s easier to coordinate campaigns | You see that social ads drive initial interest while emails close conversions, so you coordinate campaigns instead of handling them separately. |
5 common roadblocks marketers face with cross-channel attribution and how to mitigate them
Cross-channel attribution does bring with it some challenges, and understanding how to overcome them can help you develop a more successful strategy. Here are five common issues marketers face and what you can do to mitigate them.
1. Fragmented data across platforms
The challenge: Marketing data is spread across ad platforms, analytics tools, CRMs, and marketing automation software. Each may operate in isolation and have its own metrics, identifiers, and reports that don’t necessarily align. As a result, teams often struggle to collate and decipher all the information they gain from multi-channel attribution.
The solution: Reduce your reliance on each platform’s native reporting functions. Instead, consolidate your marketing data using a unified analytics platform, where you can manage attribution analysis in one place. You should also standardize the metrics and identifiers your team uses to ensure they’re using comparable data.
2. Limited first-party data availability
The challenge: Effective cross-channel attribution relies on data your business collects directly from customers. Yet many marketing interactions happen before a customer shares any identifying information. For instance, people often browse an online store several times before eventually signing up for an account, leaving your marketing team with an incomplete picture of the customer journey.
The solution: Give customers more opportunities to identify themselves during early interactions with your brand. Here are some ways you could incentivize them to share these details:
Display a website banner with a limited-time offer for account sign-ups
Ask for contact details to send quotes and other useful information
Offer free downloadable content that you send to email addresses
Give the option to complete surveys in exchange for discounts
Require users to create an account to interact with certain website features
3. Measuring offline touchpoints
The challenge: Some customer interactions still happen offline in stores or over the phone. These actions are hard to track on digital platforms, so they may not get accounted for in cross-channel attribution. However, they can still be a critical part of the customer journey, and insights from these interactions can contribute to conversions.
The solution: Identify which offline touchpoints matter most for attribution and find structured ways to record them. The best approach will depend on the type of interaction. For example, you might request a customer reference number for phone calls or introduce QR codes for discounts on in-store purchases. Log these interactions on the same system as the rest of your data from cross-device tracking and use the same metrics.
4. Inaccuracies in a cookieless ecosystem
The challenge: Marketing teams often rely on non-essential cookies for attribution tracking across sessions and channels. As more and more users choose to block tracking technologies, data becomes inconsistent, and it isn’t representative of all customer behavior.
The solution: Add server-side tagging to your setup to support more resilient attribution data collection even when users block cookies. You’ll be able to manage tracking through a server you control rather than placing cookies and other trackers in users’ browsers, which supports more accurate and reliable data.
5. Data privacy and regulatory requirements
The challenge: Strict data privacy laws like the EU’s General Data Protection Regulation (GDPR) prohibit you from processing certain types of personal data without consent. That means you’re limited to only using consented user data, as noncompliant data practices may leave you vulnerable to penalties, legal action, and regulatory scrutiny.
The solution: Automate privacy compliance with a consent management platform (CMP) like Usercentrics. The software registers each user’s location and applies relevant regulatory requirements for that jurisdiction. If someone visits you from Germany, for example, Usercentrics displays cookie banners requesting their opt-in consent and prevents tracking tools from running in accordance with European Union law.
Build a privacy-first cross-channel attribution framework with Usercentrics
When you ground your attribution strategy in consistent and high-quality data, you can reliably see how different activities contribute to different outcomes.
This level of accuracy depends on compliant data workflows. If you aren’t aligned with regulatory requirements, attribution quickly becomes unreliable and introduces risks.
The Usercentrics CMP supports privacy-first attribution through consent management and server-side tagging. These tools help you collect, process, and analyze data responsibly across your digital channels to create a more dependable attribution framework.
Across industries, companies structure their privacy policies differently depending on the data they collect, the regulations they follow, and the expectations of their audiences. Studying these examples can help provide a framework for what “good” looks like, balancing clarity, comprehensiveness, and customization.
In this chapter, we look at some of the best privacy policy examples from websites, apps, and platforms across multiple sectors, including SaaS, e-commerce, nonprofits, marketplaces, agencies, public services, and more.
For each example, you’ll find an explanation of what the company does well, where it could improve, and how you can apply the same principles to your own privacy policy.
At a glance
- Strong privacy policies use clear language, structured sections, and transparent explanations of what data is collected and why.
- Different industries require different levels of detail: SaaS, e-commerce, apps, marketplaces, agencies, gaming, and public-sector sites all approach privacy differently.
- Reviewing real privacy policy examples helps you identify best practices for data categories, legal bases, third-party sharing, retention, and user rights.
- A privacy policy must be tailored to your own data practices. Use examples or a template for inspiration, then create your own version with a tool like the Usercentrics Privacy Policy Generator to achieve and maintain privacy compliance.
SaaS / B2B privacy policy examples
SaaS and B2B companies handle a wide range of user data, from account information to usage analytics and customer support logs. Strong policies in this category balance legal accuracy with practical explanations. The best examples use clear language, structured navigation, and straightforward disclosures about cookies, analytics, and cross-border transfers.
Slack
Slack’s privacy policy is a strong example of a well-structured, enterprise-level document that still feels approachable. It uses clear headings, explains data categories in plain language, and provides detailed information about workspace data, message content, and integrations.
It also separates “information provided to Slack” from “data processed on behalf of a workspace,” which helps readers understand shared responsibilities.
Pros
- Breaks down data categories with real-world examples
- Clarifies the roles of workspace owners vs. Slack as a processor
- Includes transparent explanations about cookies and device identifiers
- Uses accessible navigation with collapsible sections
Cons
- Some sections are text-heavy and require scrolling
Notion
Notion’s privacy policy is notably readable for a productivity platform with complex data flows. It leads with a clean summary, followed by clear sections on usage data, synced content, and optional features. The policy is formatted with strong spacing, which improves readability and helps users scan for the information they need.
Pros
- Provides a high-level summary at the top
- Uses plain language to explain how content is stored
- Offers clear examples, e.g., “pages, databases, comments”
- Includes straightforward explanations of integrations and APIs
Cons
- Could provide more detail on retention periods for specific data types
Monday.com
Monday.com provides one of the better SaaS examples of a layered privacy policy. It introduces the content with a short summary, then expands into detailed sections covering data sources, processing purposes, retention, and user rights. The policy also includes helpful diagrams showing how data flows through its platform.
Pros
- Clear distinction between “User Data” and “Customer Data”
- Strong transparency about sub-processors
- Helpful visual elements that show data flows
- Straightforward explanations aro
Cons
- Some third-party lists require downloading attachments, which can slow navigation
E-commerce privacy policy examples
E-commerce businesses collect a wide range of personal data, including account details, shipping information, payment data, browsing behavior, and past purchase history.
Strong privacy policies in this category explain these practices clearly, use approachable language, and help customers understand how their information supports transactions, fulfillment, fraud prevention, and marketing preferences.
Patagonia
Patagonia’s privacy policy demonstrates how a large retail brand can be clear, transparent, and consumer-friendly. The policy uses plain language and offers strong explanations around ordering, returns, and marketing preferences.
It also includes a dedicated section on children’s privacy, which is important for brands with youth product lines that need to comply with privacy laws such as the Children’s Online Privacy Protection Act (COPPA).
Pros
- Uses accessible, conversational language
- Clearly distinguishes between “information you provide” and “information collected automatically”
- Transparent about third-party services, including payment processors and fraud-prevention tools
- Includes strong, clear user rights and contact information
Cons
- Cookie section could be more detailed for international users
Glossier
Glossier’s privacy policy is a good example for brands that use both first-party and partner-driven marketing. It explains cookies, pixels, and advertising networks in approachable terms and includes a dedicated section on how personal data supports customer experience and personalization.
Pros
- Plain-language explanations of advertising technologies
- Clear structure around purchase information and returns
- Strong use of examples to describe device and cookie data
- Helpful breakdowns of data types and purposes
Cons
- Some sections could benefit from improved cross-linking to support navigation
- Hasn’t been updated recently — regular revisions help maintain privacy compliance
IKEA
IKEA’s privacy policy is a well-structured example from a large global retailer that manages a high volume of customer data across online ordering, home delivery, loyalty programs, and in-store services.
The policy is comprehensive but still accessible, with clear language around account information, payment processing, and personalization based on browsing behavior.
Pros
- Provides strong explanations of how personal information supports delivery, assembly, and customer service
- Clearly distinguishes mandatory vs. optional data, e.g., loyalty program details
- Transparent about advertising partners and measurement tools
- Uses straightforward language to explain profiling and personalization
Cons
- Navigation varies slightly by region, and some versions are more user-friendly than others
Mobile app privacy policy examples
Mobile apps process personal data differently from websites. They often rely on device identifiers, permissions (camera, microphone, location), push notifications, in-app analytics, and third-party SDKs.
A strong mobile privacy policy explains these elements clearly, uses mobile-friendly formatting, and helps users understand how sharing personal information can support core app functionality.
Headspace
Headspace provides a clear, approachable privacy policy that works well on mobile screens. As a wellness app, it deals with a lot of private personal information. It needs to explain sensitive areas such as chat history, session behavior, and device data. Headspace does this with plain language and concise sections.
Pros
- Clear breakdown of device data, app activity, and optional profile fields
- Strong transparency about analytics and A/B testing tools
- Plain language explanations of how meditation history is used
- Well-structured for mobile scrolling and readability
Cons
- Could offer more detail on data retention timelines
Duolingo
Duolingo’s privacy policy is an excellent example of how a mobile-first product explains data collection and processing in a transparent, structured way. It focuses on learning progress, device identifiers, cookies (for web users), and analytics.
Pros
- Short, scannable sections ideal for mobile user experience
- Clear descriptions of learning data and personalization
- Transparent explanations of advertising partners for the free plan
- Strong breakdown of user rights and deletion options — key for complying with data protection laws like the European Union’s General Data Protection Regulation (GDPR) and the California Consumer Privacy Act (CCPA)
Cons
- Some global versions could clarify cookie practices more consistently
Strava
Strava is a strong example for apps that use device sensors, GPS, and community features. Its privacy policy explains how it uses sensitive personal information like location data, route maps, health-related metrics, and social interactions in a direct and transparent way.
Pros
- Detailed but readable explanation of GPS and movement data
- Transparent about optional vs. mandatory data fields
- Clear disclosures around external wearables and integrations, e.g., Apple Health
- Strong structure around privacy controls inside the app
Cons
- Some explanations around “segments” and shared data could be more prominent
Blog and publisher privacy policy examples
Blogs, news sites, and other digital publishers often rely on advertising networks, analytics tools like Google Analytics, embedded media, and affiliate programs. Their privacy policies need to communicate these practices clearly, especially when multiple third-party integrations are involved.
A strong privacy policy explains how cookies work, what cookies are in use, what data is collected during reading sessions, and how users can manage tracking preferences.
The New York Times
The New York Times provides one of the most detailed and transparent privacy policies in digital publishing. It explains the full advertising ecosystem, analytics tools, and account-level data with structured, well-labeled sections.
Pros
- Highly detailed breakdown of analytics and ad partnerships
- Clear explanations of personalization and reader behavior tracking
- Strong disclosures around third-party cookies and cross-device data
- Easy navigation with a persistent table of contents
Cons
- Some sections are dense and may overwhelm readers
Condé Nast
Condé Nast is a global media group that owns major publications like Vogue, Wired, GQ, and The New Yorker. As a large publisher with diverse digital content, it manages complex data flows across articles, videos, newsletters, and advertising partners.
Its privacy policy is a helpful example for content publishers that use multimedia, and clearly explains how interactions with articles, videos, and email links generate personal data.
Pros
- Strong transparency around embedded media (videos, maps, social posts)
- In-depth explanation of how to exercise data subject rights under global privacy laws like the GDPR and CCPA
- Clear breakdown of tracking tools and technologies (cookies, pixels, local storage, web beacons, etc.)
- Highly readable formatting for long-form content sites
Cons
- Could include more details about data retention periods
Medium
Medium’s policy is a strong example of how to explain data practices for a platform that hosts user-generated content. It covers reader behavior, writer analytics, referral data, and off-platform sign-in options.
Pros
- Clear structure around reading logs, engagement, and article stats
- Helpful examples showing how recommendations are generated
- Transparent explanation of how referrals and social logins work
- Straightforward navigation and mobile-friendly formatting
Cons
- Could provide a more detailed breakdown of advertising tools used in partner stories
Nonprofit privacy policy examples
Nonprofits can collect a wide range of personal data, from donations and membership details to volunteer information, email sign-ups, and community engagement insights. Their privacy policies often balance regulatory requirements with a trust-first approach, using clear language to reassure supporters about how their personal information is handled.
The strongest examples explain donation processing, third-party fundraising tools, and communication preferences in a straightforward, transparent way.
UNICEF
UNICEF’s privacy policy is a strong example of how global nonprofits communicate complex data practices to a broad audience. The policy clearly explains donations, newsletter subscriptions, and interactions with UNICEF’s global websites, which operate across different legal jurisdictions with different privacy laws.
Pros
- Clear explanation of data processing activities and donation-related payment processors
- Transparent breakdown of cookies and analytics tools
- Strong global structure that adapts to regional privacy laws
- Accessible, easy-to-read language suitable for public audiences
Cons
- Some regional versions are more detailed than others
WWF (World Wildlife Fund)
The WWF’s privacy policy is well-organized and supporter-focused. It clearly explains how personal data supports campaigns, fundraising, and conservation programs. The policy also includes helpful disclosures around email tracking, event sign-ups, and optional supporter profiles.
Pros
- Strong overview of how fundraising data is used
- Transparent about the email tracking technologies it uses for measuring engagement
- Clear explanation of event registrations and optional fields
- Simple, plain English structure that reflects nonprofit values
Cons
- Cookie explanations could be more detailed for audiences in the European Union
American Red Cross
The American Red Cross provides a comprehensive privacy policy that covers monetary donations, blood donations, volunteer programs, and emergency services. Because of the diversity of its programs, the policy needs to explain different data categories in a straightforward and structured way.
Pros
- Clear distinction between donations, volunteer data, and service data
- Strong explanation of third-party processors and payment partners
- Helpful details about email and SMS communication preferences
- Impressive clarity around sensitive categories and optional disclosures
Cons
- Some sections could be more concise for mobile readers
Marketplace privacy policy examples
Online marketplaces collect data from both buyers and sellers, manage payments, enable messaging, and rely on multiple third-party services. Their privacy policies need to explain these complex data flows clearly and transparently.
The strongest examples help users understand how their personal data, browsing behavior, and transaction information support platform functionality and how it’s kept safe.
Etsy
Etsy’s privacy policy is one of the strongest in the marketplace category because it explains data practices for buyers, sellers, and third-party apps in a transparent and accessible way. It also includes a strong section on seller responsibilities and how the platform handles disputes and safety checks.
Pros
- Clear breakdown of buyer vs. seller data
- Transparent explanations of messaging data, reviews, and shop analytics
- Helpful details around payments, delivery data, and third-party processors
- Straightforward navigation with expandable sections
Cons
- Could simplify advertising technology explanations for non-technical readers
Vinted

Vinted provides a strong, EU-aligned privacy policy geared toward community marketplaces. It explains messaging, listings, payment processing, and how they resolve customer complaints in accessible language. The policy also clearly describes optional vs. mandatory data fields.
Pros
- Engaging presentation style with accordions, images, and spacing to help users understand complex information quickly
- Clear descriptions of listings, messages, and user interactions
- Good transparency around identity verification and payment data
- Strong user rights section aligned with the GDPR
Cons
- Some sections could benefit from examples to support understanding
eBay
eBay is one of the most established online marketplaces, and its privacy policy reflects decades of refinement. The policy clearly explains buyer and seller data, auction and listing information, payment processing, messaging, and fraud-prevention systems. Despite the platform’s complexity, the structure remains readable and user-focused.
Pros
- Clear distinction between personal data collected for buying, selling, bidding, and messaging
- Strong transparency around security measures, such as fraud detection, identity verification, and dispute resolution
- Detailed explanations of advertising, analytics, and device data
- Straightforward navigation with a well-organized table of conte
Cons
- Some sections are long and could be simplified for mobile users
Financial services and fintech privacy policy examples
Financial services companies handle some of the most sensitive personal data: identity information, payment details, transaction history, credit checks, data used for fraud prevention and detection, and regulatory documentation. Their privacy policies must balance transparency with security safeguards, clarity with legal precision, and user expectations with strict compliance requirements.
PayPal
PayPal’s privacy policy is a robust example of how global financial platforms communicate complex processing activities. It covers payments, merchant data, identity checks, device data, dispute resolution, and international transfers in a structured, clear way.
Pros
- Highly detailed explanations of transaction data and payment processing
- Clear breakdown of fraud-prevention and identity-verification measures
- Transparent about cross-border data transfers and international affiliates
- Strong navigation, with well-labeled sections and summaries
Cons
- Length can be overwhelming for users who want a quick overview
Revolut
Revolut offers one of the cleaner, more modern fintech privacy policies. It uses a structured layout, concise language, and strong visual spacing to help users understand how their personal information, such as financial, device, and location data, support app features.
Pros
- User-friendly design with straightforward language and bold imagery
- Clear distinction between required personal data (identity verification) and optional data (preferences)
- Transparent explanations around card transactions, transfers, and currency exchanges
- Straightforward overview of device data, app metrics, and crash logs
- Helpful user rights section aligned with UK and EU requirements
Cons
- Could include more detail on retention periods for financial records
Wise (formerly TransferWise)
Wise provides one of the most readable international finance privacy policies, with a focus on transparency, cross-border compliance, and user-friendly explanations. It breaks down personal data uses across transfers, account activity, verification, and global partners.
Pros
- Strong, accessible explanations of identity checks and anti-money-laundering requirements
- Clear detail on international transfers and correspondent banks
- Transparent about how it uses personal information from device data, app behavior, and security features
- Well-organized headings that support scanning
Cons
- Could provide more examples showing how optional data is used
Hospitality and travel privacy policy examples
Travel and hospitality companies process large volumes of personal data: identity documents, payment information, booking records, loyalty profiles, travel preferences, and sometimes sensitive personal information like accessibility requirements.
A strong privacy policy in this category balances trust, safety, and transparency while explaining how personal data flows through multiple third-party sites, including hotels, airlines, transportation providers, payment processors, and booking platforms.
Airbnb
Airbnb manages global accommodation data, guest and host accounts, identity verification, payments, reviews, and safety systems. Its privacy policy is thorough yet accessible, with detailed explanations of how personal data supports reservations, trust, and platform security.
Pros
- Clear, well-structured explanations of identity verification and fraud screening
- Transparent overview of booking, messaging, and review data
- Strong disclosures around device information and geolocation
- Helpful diagrams and summaries that show how data flows through the platform
Cons
- Some sections rely heavily on legal definitions that could be simplified
Marriott International

Marriott International’s privacy policy is a strong example for large hotel chains. It explains how personal data is processed through reservations, check-ins, on-property services, loyalty programs, and partner bookings. The policy uses clear headings and accessible language, especially valuable given the scale of Marriott’s operations.
Pros
- Detailed breakdown of reservation, stay-related, and loyalty program data
- Clear explanation of how personal information is shared across hotels and franchised locations
- Transparent disclosures about payment processing and optional preference information
- Strong global compliance alignment across regions.
Cons
- Some regional variations are lengthy and require multiple clicks to navigate
Booking.com
Booking.com provides a comprehensive privacy policy that covers hotels, flights, car rentals, experiences, and travel partners. The policy is well-structured and uses easy-to-understand summaries to explain how personal and booking data is handled.
Pros
- Clear distinction between data required for bookings, payments, and customer support
- Strong transparency around the many third-party integrations involved in travel services
- Well-written explanations of cookies, analytics, and app tracking
- Strong focus on user rights and communication preferences
Cons
- Could simplify its advertising disclosures for casual readers
Agencies and service provider privacy policy examples
Agencies and service providers, including marketing firms, creative studios, consultants, IT services, and B2B support partners, process a mix of client, prospect, and website visitor data. Their privacy policies need to clearly explain what data is collected during project work, how files and communications are handled, and how marketing tools like analytics and CRM systems support business development.
Accenture
Accenture’s privacy policy is detailed but readable, offering a strong model for large professional service organizations. It covers recruiting, client engagements, website analytics, and global operations. Despite its scale, the policy maintains clarity through well-labeled sections and structured summaries.
Pros
- Strong organization with clear explanations of core data categories
- Transparent disclosures around global offices, data transfers, and sub-processors
- Detailed explanations of analytics, cookies, and personalization
- Straightforward guidance on rights, preferences, and deletion
Cons
- Some definitions run long and could be streamlined for quick scanning
Ogilvy
Ogilvy’s privacy policy is a solid example for marketing and advertising agencies that use analytics, CRM tools, and audience insights. The policy explains cookie technologies, recruitment data, client communications, and website tracking in a clear and structured way.
Pros
- Plain language explanations of advertising technologies and cookies
- Strong breakdown of recruitment, client, and marketing contact data
- Clear structure that separates website tracking from client data practices
- Good transparency around global offices and regional requirements
Cons
- Could provide more examples showing how optional client information is used
Deloitte Digital
Deloitte Digital provides a strong example for digital transformation and technology consultancies. Its privacy policy outlines how project data, communication history, customer interactions, and analytics metrics are used during client engagements.
Pros
- Strong clarity around project-related data, proposals, and client communication
- Transparent about analytics, tagging, and CRM tools
- Clear navigation and regional privacy addenda for global audiences
- Helpful breakdown of what data is needed to provide services
Cons
- Some sections refer back to broader Deloitte policies, requiring extra clicks
Gaming privacy policy examples
Gaming platforms and apps collect a unique mix of personal data: device identifiers, gameplay activity, chat and community interactions, friend connections, parental controls, and sometimes even sensitive behavioral analytics.
Strong gaming privacy policies explain these data flows in a clear, user-friendly way while addressing online safety, anti-cheat systems, and optional social features.
Epic Games
Epic Games, the developer and publisher behind Fortnite and Rocket League, provides one of the most comprehensive privacy policies in the gaming space. It covers account data, purchase history, gameplay analytics, chat features, and interactions across the Epic ecosystem.
Pros
- Clear explanations of gameplay data, device information, and purchase history
- Strong transparency around voice and text chat moderation tools
- Straightforward overview of parental controls and youth privacy
- Well-organized navigation that separates store, launcher, and game-level data
Cons
- Some sections blend platform-wide and game-specific information
Roblox

Roblox’s privacy policy is a standout example for platforms with young audiences. It provides clear explanations of account data, parental permissions, community interactions, in-game purchases, and safety tools, all in accessible language.
Pros
- Detailed section on youth data and parental controls
- Clear explanation of user-generated content, chat data, and reporting tools
- Strong detail around device identifiers and app analytics
- Helpful visuals and expandable sections for readability
Cons
- Could simplify some community and moderation explanations
Steam (Valve)

Steam’s privacy policy is a solid example for PC gaming platforms that manage purchases, community interactions, chat logs, and game telemetry. The policy maintains transparency while covering a wide set of data types.
Pros
- Clear explanation of purchase history, wishlists, and gameplay activity
- Transparent disclosures around anti-cheat systems and fraud detection
- Detailed breakdown of community data: chat, groups, workshops, and forums
- Straightforward navigation with region-specific additions
Cons
- Some legacy terminology could be updated for clarity
Government and public sector privacy policy examples
Government and public-sector organizations collect personal data across a wide range of services. They deal with everything from benefit applications and tax filings to transportation tools, public health communications, and community programs. Their privacy policies must be exceptionally clear, because they serve broad audiences with different levels of digital literacy and operate under strict legal standards.
GOV.UK (UK Government Digital Service)
GOV.UK provides one of the most readable and structured privacy policies in the public sector. It uses clear, straightforward language to explain how user data supports digital services, security, and accessibility. Because many government transactions go through GOV.UK, the policy covers a wide spectrum of personal data types.
Pros
- Plain-language explanations accessible to all reading levels
- Clear breakdown of cookies, analytics, and essential functionality
- Transparent about security logging and fraud-prevention measures
- Strong navigation and cross-linking to service-specific policies
Cons
- Some service-level policies vary in detail and require additional clicks
IRS.gov (U.S. Internal Revenue Service)
The IRS privacy policy is a strong example of a legally rigorous, security-focused document. While the language is more formal, it provides clear explanations of what tax data is collected, how it is protected, and how citizens’ personal information is shared under federal law.
Pros
- High-level detail around legal requirements and secure handling
- Transparent explanation of what data is mandatory for tax filings
- Straightforward overview of identity verification and anti-fraud tools
- Clear separation of website analytics vs. tax-processing data
Cons
- Could be more user-friendly for non-technical, non-legal audiences
Canada.ca (Government of Canada)
The Government of Canada provides one of the most user-focused public-sector privacy examples. It uses simple language, strong summaries, and bilingual content that explains cookies, analytics, metadata, and account services across multiple platforms.
Pros
- Very readable summaries with accessible explanations
- Clear cookies and analytics section for government websites
- Transparent about metadata used for cybersecurity and performance
- Consistent structure across nearly all government services
Cons
- Some departmental links route to separate privacy notices, increasing navigation steps

As privacy regulations tighten and browsers limit third-party tracking, businesses are under pressure to rethink how they collect and manage user data.
Server-side tagging (SST) has emerged as a more accurate, secure, and resilient alternative to traditional client-side tracking in many scenarios. With an SST setup, event data is routed through a tagging server that you control, which gives you more say over which information is shared, where it’s processed, and how it’s used.
You have a number of options for how and where your tagging server is hosted. That decision can impact everything from privacy compliance and marketing performance to team workload and overall costs. This guide covers the most common hosting options to help you decide which setup is right for your business.
At a glance
- Server-side tagging provides a more accurate, secure, and privacy-compliant alternative to client-side tracking, especially as browser restrictions tighten.
- Choosing self-hosted, cloud, or fully managed SST determines how much control, complexity, and responsibility your team takes on.
- Every hosting model involves trade-offs among cost, data control, compliance risk, and required technical expertise.
- The right SST setup depends on performance goals, data residency needs, available technical capacity, and long-term scalability.
- Managed solutions like Usercentrics’ streamline setup, consent enforcement, and maintenance, enabling faster, more reliable, privacy-compliant server-side data collection.
Server-side tagging hosting explained
Marketers have traditionally relied on client-side tracking to measure user activity. In this setup, a script fires in the user’s browser when they interact with a website. The data that is collected is then sent directly to third-party analytics or ad platforms.
As data privacy laws and browser restrictions have tightened, it has become clear that this method of monitoring events has an expiration date. Server-side tagging solves that problem.
With SST, tracking tags still fire in the user’s web browser, but the event data is sent to a tagging server that you control or manage. That server runs your container and processes or filters all collected data before sending it to approved destinations.
What hosting options do you have when setting up SST?
Server-side tagging hosting addresses how and where you deploy the server layer that processes tracking data. You have a few options:
Your own server cluster on a cloud provider like Google Cloud Platform (GCP)
A container in a function‑as‑a‑service (FaaS) environment like Google Cloud Run (GCR)
A specialized managed hosting service like Usercentrics’
The type of hosting you opt for will depend on your business’s financial and personnel resources. For instance, running your own infrastructure means you’ll need to plan for provisioning, scaling, security patches, and changes to monitoring and vendor application programming interfaces (APIs). Using a hosting provider is less resource-intensive, but could become costly.
Your hosting choice will also influence your site’s performance, how much control you have over data routing, and how well you’re able to comply with data privacy regulations like the European Union’s General Data Protection Regulation (GDPR) or California Consumer Privacy Act (CCPA).
Server-side tagging hosting setups compared
Making an informed decision about your SST hosting setup can help you handle third-party cookie deprecation, reduce data loss caused by browser restrictions, improve marketing attribution, and strengthen control over data processes.
Before you choose where to host your tagging server, it’s worth stepping back to consider what really matters: performance, cost, data privacy compliance, and internal capacity.
Each setup comes with trade-offs, and the right choice depends on how much flexibility, control, and technical involvement you’re looking for.
The cost of server-side tagging is another consideration. It can vary significantly depending on your traffic volume, hosting provider, and whether you choose a managed or self-managed setup. You’ll also need to factor in potential expenses for team resources, maintenance time, and any additional tools you may need.
If you operate in a regulated industry, or if your users are based in the EU, you may also need to comply with data residency rules. That could mean choosing a server that’s hosted in the EU to meet GDPR requirements for international data transfers.
Let’s take a closer look at the three SST hosting setup options to find the right fit for your business.
Self-hosted
A self-hosted setup gives you maximum control over your SST environment, but it also requires the most responsibility.
In this model, you manage the entire infrastructure where your tagging server runs, whether that’s on a private server or within your own cloud account on Amazon Web Services (AWS), Microsoft Azure, or Google Cloud Platform (GCP).
Self-hosting requirements
Provision the server
Install and maintain the tagging container
Secure the environment
Scale to handle traffic
Verify that data flows correctly
You’re also responsible for configuring your own domain and integrating the tagging server with tools like Google Analytics 4 or Meta Ads.
A self-hosted setup enables full data ownership and fine-grained control over how and where data is processed, which is critically important for companies operating in highly regulated regions and sectors.
Still, it’s not for everyone. Self-hosting requires significant DevOps resources and ongoing effort to keep data secure and maintain privacy compliance. It also introduces more opportunities for misconfiguration, which could negatively impact performance and attribution accuracy while undermining data privacy compliance.
Pros
- Complete control over infrastructure, configuration, and data processing
- Ideal for meeting strict data security and residency requirements
- Supports fine-tuned optimization for performance and privacy
Cons
- Requires significant internal DevOps capacity and technical oversight
- You are responsible for setup and maintenance
- Higher risk of misconfiguration or data privacy compliance gaps without proper controls
Cloud platform hosting
Cloud platform hosting involves deploying your tagging server on a public cloud infrastructure like GCP, AWS, or Azure.
In this setup, you rent virtual servers where you install and run your SST container, usually the Google Tag Manager server container. However, you’re still responsible for provisioning, configuring, and maintaining the environment in which your server container works.
You choose the server specs, region, and scaling behavior, and you manage the container environment. That means this hosting setup gives you a higher degree of control, but it also means that you’re responsible for configuration, security patches, monitoring, and ongoing maintenance.
For example, many businesses choose to deploy a GTM server container on Google App Engine or Google Compute Engine. These services enable you to set up a custom subdomain (such as tags.yoursite.com), route events from the browser to your tagging server, and forward them to tools like Google Analytics 4 or Meta Ads.
While cloud platform hosting gives you a high degree of flexibility and control over your data collection practices, it still requires significant hands-on involvement compared to managed alternatives.
Pros
- Full control over your server configuration, data collection and routing, and scaling
- Capable of meeting strict GDPR data residency requirements
- Compatible with popular services like the Google Tag Manager server container
Cons
- Requires internal setup, updates, and infrastructure management
- You’ll need DevOps knowledge to effectively deploy, secure, and monitor the setup
- Usage-based billing can increase SST costs during traffic spikes
Managed service hosting
Managed hosting removes the complexity from setting up and running your server-side tagging environment. A third-party provider handles the technical setup, scaling, security, and monitoring for you.
This is the fastest and most hands-off way to get started with SST. It’s ideal for teams that don’t have in-house DevOps capacity or simply want to avoid the operational overhead.
You get the benefits of SST, such as greater control over data sharing and improved data quality, without having to manage the infrastructure layer yourself.
For instance, with Usercentrics you get a fully managed SST environment that includes pre-configured support for Google Analytics 4, Meta Ads, and Google Ads. It also integrates with Usercentrics CMP so that only consented data is processed and shared, which streamlines compliance with the GDPR and other data privacy regulations.
The trade-off is that managed hosting tends to cost more over time compared to DIY setups, especially at higher volumes. You also sacrifice some flexibility around server location and configuration. That said, the time savings and risk reduction make it the most efficient option overall.
Pros
- Quickest and easiest way to implement server-side tagging
- No need for internal DevOps or cloud expertise
- Includes maintenance, scaling, security, and vendor integration
Cons
- Can be more expensive than self-managed hosting options
- Less flexibility over server configuration and data routing
- Potentially less control over server location and data privacy settings
Tips for choosing the right SST hosting setup for your business
| Hosting type | Data control | Cost and resources | Compliance risk | Setup complexity |
| Self-hosted | High | High internal effort, lower direct cost | Low (if configured correctly) | High |
| Cloud hosting | Moderate | Moderate internal effort, variable cost | Moderate | Moderate |
| Managed hosting | Moderate | Lower internal effort, higher direct cost | Low | Low |
The best hosting setup for server-side tagging depends on which data privacy laws you must comply with, your team’s technical knowledge, performance expectations, your plans for growth, and your budget.
Data residency and regional compliance
If your business handles personal data across regions, pay close attention to data residency and transfer rules. For example, hosting in the EU may be necessary in some cases to support GDPR requirements related to data transfers and residency.
Technical capacity and internal resources
Your team’s technical capacity should also shape your decision. Companies with strong DevOps support might lean toward cloud or self-hosted options, while leaner teams often benefit from the speed and simplicity of a managed service.
Performance and scalability considerations
Consider performance and scalability. Server proximity, request handling, and auto-scaling capabilities can all affect how quickly data is processed and how reliably it reaches your downstream tools.
Cost and operational overhead
Financial and resource costs matter. Monthly hosting fees aren’t the only SST expense to keep in mind. The time required for maintenance and upkeep will affect the ongoing costs, so it’s wise to weigh infrastructure savings against the hidden cost of complexity.
Is setting up server-side tagging worth it? Here are 3 key benefits
While SST takes more effort to implement than traditional client-side tracking, the long-term advantages are often worth it. Here are three of the most important benefits of server-side tagging.
Data control and privacy
You decide what event data gets collected, and you’re in control of sending data to third parties. This helps you to stay compliant with the requirements of privacy laws and partner platforms’ policies while building user trust.
Enhanced data quality and reliability
You’re less reliant on browser tags that can be affected by ad blockers, tracking prevention, or poor network conditions. As a result, server-side data helps you better understand your audience.
Improved website performance
Offloading heavy third-party scripts to the server can speed up load times and reduce browser strain, leading to a better user experience and increased conversion rates.
How Usercentrics fits into your server-side hosting setup
Usercentrics Server‑Side Tagging solution combines server-side hosting and real-time consent management in one environment, which makes it easier to collect user data while complying with the requirements of major data privacy laws.
We take care of everything from provisioning the infrastructure and orchestrating tags to managing security and scaling. We also host your Google Tag Manager server container in our secure environment and seamlessly sync it with our CMP.
Real-time server-side consent signals are passed from the user’s browser and enforced before any tags are triggered to enable accurate, compliant data collection that’s driven by user choices.
Usercentrics Server‑Side Tagging also integrates with platforms like Meta, TikTok, and LinkedIn, making it easy to maintain accurate measurement and privacy compliance without the overhead of managing multiple moving parts.
Our comprehensive approach simplifies SST and consent management, so your team can focus on using data to develop strategies that drive growth.
You’re probably making marketing decisions based on incomplete data. Not by choice, but because browser-based analytics can’t capture everything that happens on your site anymore. Ad blockers hide users, Safari restricts cookies, and Firefox blocks tracking scripts by default. So the analytics you rely on show a fraction of actual activity.

Server-side analytics fixes this visibility problem. By shifting data collection from the browser to your own server, you capture what is actually happening on your site. The insights become more complete, and you gain direct control over how data is handled and shared.
At a glance
- Server-side analytics processes data on your server instead of in the user’s browser.
- Server-side analytics reduces data loss from ad blockers and browser restrictions while giving you direct control over data collection and distribution.
- Server-side analytics differs from server-side tracking: analytics focuses on aggregating insights, while tracking monitors individual user behavior.
- Valid user consent remains a GDPR requirement, but server-side infrastructure helps you consistently enforce consent decisions at a single control point.
What is server-side analytics?
Server-side analytics collects and processes website and app data on your own server instead of in a user’s browser.
So when someone visits your site or uses your app, their interactions generate requests to your server. Your server captures those requests, processes the relevant data, and forwards it to your analytics platform.
Server-side analytics changes where data collection happens. Instead of relying on JavaScript that runs in the browser and can be blocked or restricted, you collect data after the request reaches your infrastructure. This means your server controls what information gets extracted, how it’s formatted, and where it goes next.
The distinction matters because it determines data quality. Browser-based collection depends on scripts loading successfully, running without errors, and not being blocked by privacy tools.
Server-side data collection reduces exposure to those potential failure points. If a user’s browser sends a request to your server, you can capture data from that interaction regardless of their ad blocker settings or browser privacy configurations.
Learn more about server-side tracking and tagging, and how they can impact your data collection.
Server-side analytics vs server-side tracking — what’s the difference?
The terms sound similar, but they serve different purposes in your data infrastructure.
Server-side analytics focuses on aggregating and analyzing user behavior to generate insights. It’s about understanding patterns — conversion rates, traffic sources, user flows — at a level that helps you make strategic decisions. Analytics turns raw data into reports and dashboards that tell you what’s working and what isn’t.
Server-side tracking is the broader collection mechanism. It captures individual user interactions and can feed multiple systems beyond just analytics platforms.
These two aspects work together. Your server-side tracking setup collects the data, and your analytics server side tracking processes it into the metrics you actually use. Understanding the distinction helps when you’re planning your implementation. You need tracking infrastructure first, then you can route that data to analytics tools.
Learn more about the difference between server-side vs client side tracking.
Benefits of server-side analytics in a privacy-first world
You’ve probably noticed that data collection is getting tougher. As a marketer, this impacts your marketing strategies, decision-making, and budget allocation. Server-side analytics can help you adapt to these realities while providing insights that drive your business decisions.
More accurate data collection
Ad blockers and browser privacy features can’t interfere with server-side analytics the way they disrupt client-side scripts. Your server receives and processes requests directly, capturing interactions that traditional analytics would miss entirely.
This means your traffic numbers more accurately reflect reality instead of showing a diminished version filtered through various blocking mechanisms. And with a more complete dataset, your attribution models become significantly more reliable, since they’re no longer trying to infer user journeys from partial or missing client-side signals.
Better control over data handling
With server-side analytics tracking, you determine what data gets collected at the point of capture. You can filter out unnecessary information, anonymize sensitive details, or structure data to meet specific compliance requirements before it reaches any third-party platform.
This level of control becomes essential when you need to demonstrate compliance with regulations like the EU’s General Data Protection Regulation (GDPR). You’re not guessing what happens to data after it leaves your site; you’re making those decisions directly.
Improved website performance
Moving analytics processing to your server reduces the number of scripts running in the browser. Fewer scripts mean faster page load times, which improves user experience and can positively impact SEO rankings. Your site becomes more responsive, and users don’t experience the lag that can come from loading multiple third-party tracking scripts.
The performance improvement becomes noticeable, particularly on mobile devices or slower connections.
Stronger privacy compliance
Server-side infrastructure enables you to enforce user consent decisions at a single control point.
When someone declines tracking consent, you can prevent data from being sent to analytics platforms at the server level. This enforcement happens in one auditable location rather than relying on various client-side scripts to respect consent signals correctly.
This means your privacy controls become more reliable and easier to verify during compliance reviews.
Better data quality
Server-side data collection reduces discrepancies caused by client-side variables like browser extensions, JavaScript errors, or slow connections. This is because your server processes requests consistently, leading to cleaner, more reliable analytics data.
This consistency makes your metrics more trustworthy, which matters when you’re making strategic decisions based on what the data tells you.
How does server-side analytics work?

At a high level, server-side analytics shifts data collection away from the browser and into your own infrastructure. As a result, the entire tracking process becomes centralized, controlled, and more reliable. The workflow is straightforward once you break it down.
Everything begins with a user interaction, such as viewing a page, clicking a button, completing a purchase, or any other meaningful event.
Rather than sending this data directly to a third-party platform, your website or app bundles the event details into a single, unified request. This is usually handled by a lightweight tag or pixel that sends the data to your own server or a dedicated server-side container, such as Google Tag Manager Server-Side.
Once the data reaches your server, it enters what is effectively the command center of the entire process. Here, you can enrich the event with internal data, combine it with CRM or order information, or add contextual details that would be impossible to capture client-side.
You also gain the ability to filter and anonymize the data and remove sensitive personally identifiable information (PII) like IP addresses before anything is shared externally, which significantly strengthens your privacy posture.
This is also where you validate and normalize the data to ensure accuracy, correct formatting, and consistency across platforms.
And because the interaction originates on your domain, you can set and manage first-party cookies, which are more durable and less prone to browser restrictions than third-party cookies.
After processing, your server prepares the final, clean dataset and forwards it to any analytics or marketing platforms you rely on, using their server-side APIs. The platforms receive this server-verified data as if it had been sent from the browser, but with greater accuracy, consistency, and privacy control built in.
How to set up server-side analytics
Implementing server-side analytics does require some technical work, but the process follows a clear sequence. By completing these steps, you gain a reliable source of truth for your lead generation efforts.
1. Choose a server environment
You need a server to process incoming requests and route data to your analytics platform. So the first step is to choose your server.
This could be your existing web server, a dedicated analytics server, or a cloud-based solution like Google Cloud Platform, AWS, or Azure. A key requirement when choosing is ensuring that this system is stable and scalable enough to handle the highest traffic volumes without compromising your site’s performance or its ability to capture every lead.
2. Configure data collection endpoints
Next up, set up endpoints on your server to receive data from your website or app. These endpoints capture user interactions and extract the information you need.
Define high-value conversion signals you want to capture, like lead forms, whitepaper downloads, or key site engagement. Then structure them in a format your analytics platform can accept.
This configuration gives you the control that makes server-side analytics valuable in the first place.
3. Integrate with your analytics platform
The next step involves connecting your server to your chosen analytics tool. If using Google Analytics 4, this involves implementing the Measurement Protocol to send validated data securely.
Set up authentication, configure the connection parameters, and test to ensure data flows correctly from your server to your analytics reports.
4. Implement consent enforcement
Integrate your consent management platform (CMP) with your server-side infrastructure so that consent decisions get communicated to your server in real time. Your server then uses this information to determine whether to send data to analytics platforms.
This process provides an auditable system that demonstrates consistent respect for user privacy mandates like those from the GDPR.
5. Test and validate
Verify that data is being captured accurately, consent decisions are being enforced, and analytics reports reflect the correct information.
To ensure this, check for discrepancies between server-side and any remaining client-side data during the transition period. Additionally, look for edge cases where data might not flow as expected.

When to track on the client side versus the server side?
The choice between client-side and server-side analytics depends on what you need to measure and your technical capabilities. Each approach has strengths that suit different tracking scenarios.
When to track on the client side
Client-side analytics makes sense when you need to capture browser-specific data that doesn’t generate server requests. For example, screen resolution, viewport size, JavaScript events, video plays, and scrolling behavior. These interactions happen entirely in the browser. Client-side scripts can capture them directly without requiring server communication.
In addition, single-page applications often rely on client-side tracking because navigation happens without page reloads that would trigger server requests.
Setup simplicity also favors client-side analytics. If you’re running a small site with limited technical resources and browser-based tracking provides sufficient accuracy, client-side tools get you up and running quickly because the barrier to entry is lower.
When to track on the server side
Server-side analytics becomes the better choice when accuracy matters more than convenience.
If ad blockers and browser restrictions are creating noticeable gaps in your data, moving to server-side collection eliminates those blind spots. Your core metrics, like pageviews, conversions, and user flows, become reliable again.
Control over data handling is another reason to choose server-side. When dealing with sensitive information or need to enforce strict privacy controls, processing data on your own server before sharing it with third parties gives you the oversight that compliance requires. You determine what gets collected, what gets filtered, and what gets sent downstream.
In addition, performance considerations push teams toward server-side analytics as well. Reducing the number of client-side scripts improves page load times, which affects user experience and SEO. If your site is already script-heavy, shifting analytics to the server can make a noticeable difference in how responsive your site feels.
Complex user journeys that span multiple devices or platforms benefit from server-side consistency as well.
Many companies choose to use both approaches. For instance, core metrics run server-side for accuracy and control, and browser-specific interactions stay client-side because that’s where they naturally occur.
This hybrid model gives coverage while leveraging the strengths of each method. As browser restrictions continue tightening, the balance is shifting more toward server-side, but that doesn’t mean client-side tracking disappears entirely.
Can server-side analytics tracking help you meet GDPR requirements?
Server-side analytics can support GDPR compliance, but it does not replace the basic legal requirements. Companies still need a legal basis for processing personal data, which often requires valid consent.
What changes is your ability to enforce consent decisions reliably. When data flows through your server, you control exactly what gets collected and where it goes. If a user declines analytics consent, your server blocks that data from reaching analytics platforms.
This enforcement happens at a single point (your server), making it more reliable than client-side consent mechanisms that can be bypassed or disrupted.
The GDPR still requires you to collect informed consent before processing personal data. Server-side analytics doesn’t eliminate this requirement. You need a consent management platform to present consent options to users, capture their choices, and communicate those decisions to your server.
The CMP and your server-side infrastructure work together: the CMP handles consent collection, and your server enforces the decisions.
Take control of your analytics data while respecting user privacy
Server-side analytics addresses the data accuracy problems that browser restrictions and privacy regulations have created. By processing data on your own infrastructure, you capture what’s actually happening on your site while maintaining the control needed for compliance.
The implementation requires technical setup and integration with consent management systems. However, the payoff — reliable data, enforceable privacy controls, improved performance — makes the effort worthwhile.
As browser-based tracking becomes less viable, server-side analytics offers a sustainable path forward that balances business needs with user privacy expectations.